BMW E36 Blog

Professional Car Audio Upgrade Translated

9th May 2008

Professional Car Audio Upgrade Translated


Thanks to Valery for the translation of the Professional Car Audio Upgrade. He is so kind and has translated the whole DIY for us. I’m still confused a little bit about some parts of this DIY because I don’t have much knowledge about fiberglass, but I think the result is awesome! Now, you can understand the procedure easily. Thanks again Valery.

Disclaimer: Use this info at your own risk!! I’m not responsible if this didn’t work for you :-).

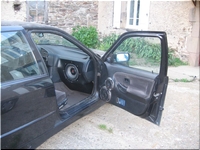
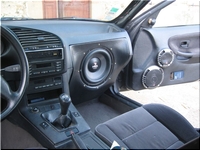
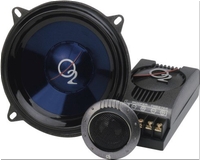
Hi everyone, I’m 19 and I own a E36 325TDS with a lot of extra parts for it so that I modify inside and out a little bit. I installed a Oxygen Alium 5, 13cm diameter Kit and a 20cm Speaker Oxy Alium 203.

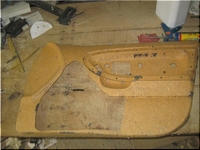
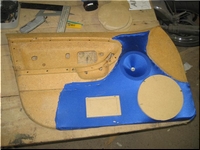
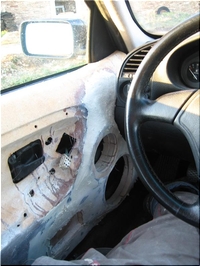
First, I removed the vinyl, and then cut the panel

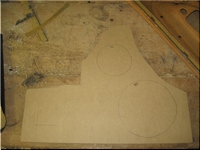
Next, I cut a piece of MDF (Medium Density Foam) of 19mm thick

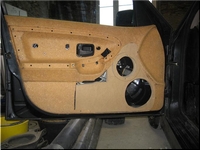
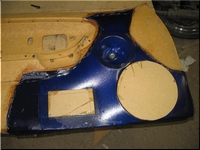
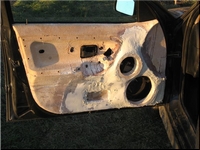
A little bit of fiber to maintain the MDF. Check out the door:

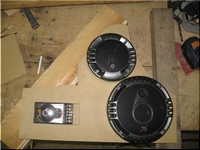
Here is what I used, you’ll tell me “It is not wow” but I couldn’t afford better, these speakers are really good for the price.

Setting the canvas, this is not some cheap fabric :p this is lycra 😉 I know I know 😉 back to work, major advantage of the lycra is its scalability.

Application of resin (What is that? Ken can you help ?):

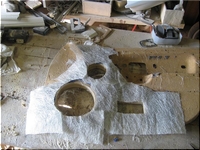
Once the resin is dry on the fabric, cut a piece of glass fiber as so:

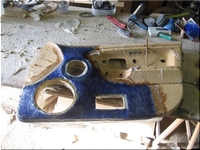
What you get once resin applied:

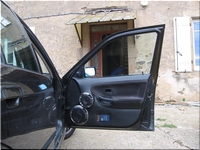
Now the most annoying part of the project 🙁 smooth all of it :s:  I hate doing it lol Here is what you get when installed:

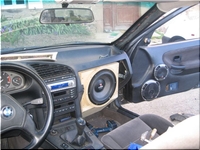
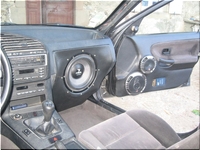
The installation progressed a bit, I replaced my previous kit by a MAC Audio Diamonds 2.13Here are the pics 🙂

So, It’s been a while since I’ve done it, I will soon replace them by a Focal Utopia 136W kit.

My latest project:
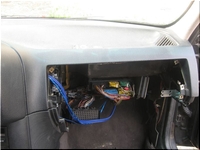
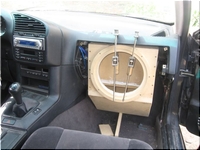
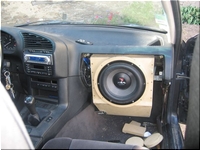
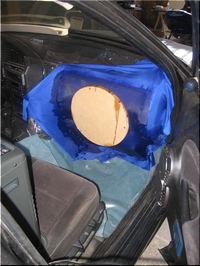
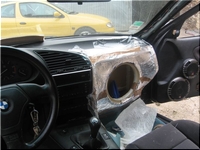
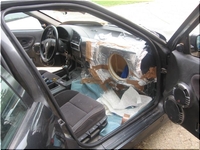
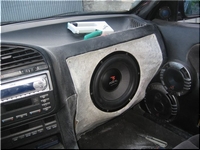
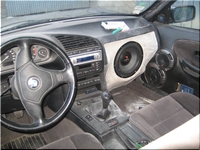
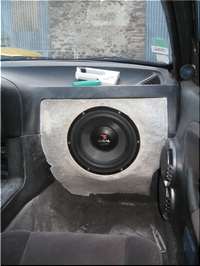
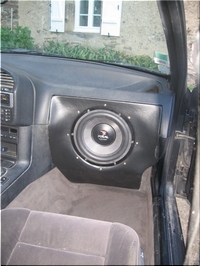
Here is the idea, as you might remember I’ve installed new speakers in my doors, I then realized that I couldn’t open my glovebox anymore lol Anyway, I decided to fit a subwoofer instead of the glovebox.The subwoofer is a Focal 27A, here we go, pictures !

First, build the box in medium 19mm, I reached a volume of 15L. I had to take out the fan system to gain space and pack everything to fit it in.

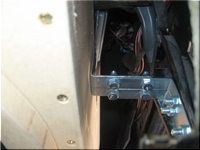
Fixing plate to hold it

What It looks like after the Subwoofer is inserted.:

Application of the canvas to get a good shape.

I then used foil to unmould the shape I got, made of fiber.

What you get with 3 layers of fiber. Where I am right now.

Smooth the whole thing and black vinyl, with golden screws. Check out the result


Are you looking for more do it yourself procedures (DIY) ? I recommend the Bentley BMW 3 series service manual for you. I got it and I think it’s a gold mine for us -BMW E36 Owners-. If you didn’t grab your copy yet, get it right now! I’m sure you’ll find this book worth every penny you’ve paid for. Get the Bentley BMW 3 series service manual

BMW E36 Blog: The ultimate BMW E36 information source.

Want to receive exciting tips & information about BMW E36 cars? Enter your Email:-


posted in Audio, Do It Yourself, Tips & Tricks, Uncategorized | 5 Comments
8th May 2008

Professional Car Audio Upgrade


Hello,

Hicham was so kind to send me a link which contains a description of how to upgrade your BMW E36 car audio in a very professional way. You can check the thread here. Unfortunately, it’s in French and because I don’t know French, I had to figure this thread out using the pictures included. I’m confident you’re going to like this very much. I included here some photos that may explain the procedure, but for those of you who understand French, you can refer to the thread I pointed out. Also, it would be great if you can translate some of the text there and post it here as a comment. That would help us understand this more. Thanks Hicham for the link.

Take a look:


BMW E36 Blog: The ultimate BMW E36 M3 information source.

Want to receive exciting tips & information about BMW E36 cars? Enter your Email:-


posted in Audio, Photos, Tips & Tricks, Uncategorized | 3 Comments

1st May 2008

Turning Your BMW Lights On Automatically At Night . . . Buzzing Relay


I wrote seven articles until now about how you can make your BMW lights turn on automatically at night. I will summarize these posts for you in case you have missed them. In the first post, I proved that this should be something easy to implement inside a BMW E36 car. In the second post, I presented a circuit diagram that will help you create the electronic circuit that is supposed to control your lights and turn them on automatically when it gets dark. Of course, if you don’t know how to implement such a circuit or you simply feeling too lazy to do it, you can ask some electrician to do it for you. I’m sure he will agree if you paid him $20. In the third post, I wrote about my first attempt to implement this circuit and told you that it’s partially working but it needed some enhancements. In the fourth post, I created a video with the circuit implemented on breadboard and connected directly to my brother’s car lights. In the fifth post, I soldered the circuit on permanent board and showed you exactly how I intend to use it inside my car. In the sixth post, I posted 4 videos that I shoot while testing the auto light system. In case you didn’t see these videos I suggest you check them first before proceeding. In the seventh post, I talked about a problem in controlling the headlights of the car (low beam lights). Until that time, I was able to get my dashboard lights and the angel eyes lights to turn on automatically at night, but not the low beam lights.

When I connect the circuit to control the low beam lights, I hear a buzzing sound that comes from the relay which is supposed to work as an electronic light switch. Normally the buzzing sound indicates that the relay is connecting/disconnecting really fast and that what causes the buzzing sound. So, I tried to analyze the problem to find out what is really happening.

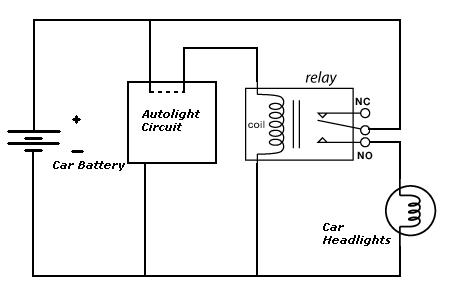
It’s all explained in the electronic diagram below:-

I think that when the Autolight circuit sends a signal to the relay, the relay simply closes the switch which turns the headlights on. The problem occurs when the switch is closed which makes both the relay and the headlights to become connected in parallel and since the headlights resistance is much lower than the relay resistance, the relay simply disconnects which makes the headlights turn off. When the headlights turn off, the electric current passes again through the relay which makes it connect again and thus turn the headlights on again. Of course, this happens very fast which results in a buzzing sound from the relay because it’s connecting/disconnecting very fast. I think I will need to make some change to the circuit to isolate its power source somehow from the headlight power. But how can I do this? this is the big question 😀 . If you have any ideas, please feel free to share them.


BMW E36 Blog: The ultimate BMW E36 M3 information source.


Want to receive exciting tips & information about BMW E36 cars? Enter your Email:-


posted in Electrical, Technical Info, Tips & Tricks, Uncategorized | 4 Comments

29th April 2008

BMW Harmon Kardon Audio System


Hi Guys,

I presented some Great BMW E36 Internal Lights photos in a post couple days ago. One of the things that I didn’t even know they existed in BMW E36 cars is the Harmon Kardon audio system. The cars with this optional audio system has a switch that is labeled "HIFI". In that post, I asked you about this switch and if anyone has it, so I got a reply from Seth and he was so kind to provide extra information about this option. You can read the description in his words below:

First off, it has 10 speakers (supposedly) although I have only seen 8 discussed in the forum I belong to. Maybe I was wrong about the subwoofer, because no one had mentioned it. It sure sounds like there’s one, though! (Tony: Valery, can you help?) The only major difference I remember from my first M3 without the upgrade, is the speakers in the front kick panels (granted it’s been 2 and a half years since that car, but I don’t remember any speakers down there), the HIFI switch that turns on an amplifier located in the left side of the trunk, next to the shock tower, and the different speakers with Harmon Kardon (HK) on the speaker shield.

The biggest problem with them is that the mid-range speakers in the front doors are prone to self-destruction at relatively low volume levels. The largest contributing factor is the automatic volume adjustment as the car gains speed (Tony: Wow! that’s a cool feature, isn’t it?). I blew my own that way! Adjust the volume level in the driveway, make it onto the freeway, and KA-POP!

BTW, if you have that annoying feature, I just learned how to fix it while I was researching the Harmon Kardon (HK) stereo. First, you start with the stereo off. Turn it on, and hold the "m" button for approx. 10 sec. The serial # of the radio should appear on the screen. Once it does, use the + and – buttons until you see GAL 1-6 . Then use the < and > buttons to adjust it up or down. 1 is the lowest change, and 6 vice versa. I believe that should also work on British BMW’s as well, even though it was explained for an American M3.

These are some photos of the Harmon Kardon audio system:


BMW E36 Blog: The ultimate BMW E36 M3 information source.

Want to receive exciting tips & information about BMW E36 cars? Enter your Email:-


posted in Audio, Technical Info, Tips & Tricks, Uncategorized | 6 Comments
11th April 2008

Turning Your BMW Lights On Automatically At Night . . . Main light


I wrote six articles until now about how you can make your BMW lights turn on automatically at night. I will summarize these posts for you in case you have missed them. In the first post, I proved that this should be something easy to implement inside a BMW E36 car. In the second post, I presented a circuit diagram that will help you create the electronic circuit that is supposed to control your lights and turn them on automatically when it gets dark. Of course, if you don’t know how to implement such a circuit or you simply feeling too lazy to do it, you can ask some electrician to do it for you. I’m sure he will agree if you paid him $20. In the third post, I wrote about my first attempt to implement this circuit and told you that it’s partially working but it needed some enhancements. In the fourth post, I created a video with the circuit implemented on breadboard and connected directly to my brother’s car lights. In the fifth post, I soldered the circuit on permanent board and showed you exactly how I intend to use it inside my car. In the sixth post, I posted 4 videos that I shoot while testing the auto light system. In case you didn’t see these videos I suggest you check them first before proceeding.

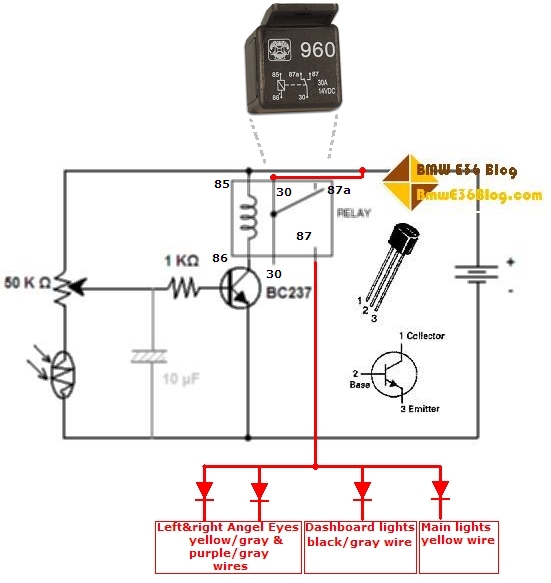
Aright, today, I decided to solve the last problem that I’ve mentioned in the last post, which is main lights problem. I didn’t know previously which wire(s) I should use to turn the main lights on using the auto-light circuit, so my car used to turn the angel eyes lights and the dashboard lights on automatically at night, but not the main lights. As you can see, this is good, but it’s not good enough. So, I decided to try and solve this problem today. To do that, I looked in my Bentley manual and I found the lighting system diagram for the BMW E36. I finally found that I should use the yellow wire to turn the main lights on, so now it should be a very easy task. Take a look at the new wiring diagram for the auto-light circuit. The new modifications are in red:

Please notice that I’ve introduced 4 diodes to get 4 wires out of the relay to be able to control:
1. Left angel eye light (yellow/gray).
2. Right angel eye light (purple/gray).
3. Dashboard lights (black/gray).
4. Main lights (yellow).

The diodes should serve as a precaution measure to prevent the interference between the 4 parts mentioned above.

With this new information, I thought that I’ve figured the solution to my problem, so I decided to go out and connect it to see if it’s going to work or not.

For some reason, when I connect the fourth controller to the yellow wire (main lights), the circuit started to make a buzzing sound (resulting from the relay being switched on and off very quickly) and the headlights turn on and off very quickly too. I’m not really sure about this problem and how to solve it. So, I’m going to review everything I did. The only reason I can think of right now that is causing this problem is that the relay is not suitable for the headlights some how. I’m going to try another relay with larger current limit and see if this solves the problem. If you guys have any idea why this is happening, I would appreciate your comments.

As you can see, this is still unfinished work, so if you want to implement this in your car, I suggest you wait until I figure out the solution for this problem to avoid paying for parts and work that is not proven to be 100% successful yet.


BMW E36 Blog: The ultimate BMW E36 M3 information source.


Want to receive exciting tips & information about BMW E36 cars? Enter your Email:-


posted in Do It Yourself, Electrical, Technical Info, Uncategorized | 8 Comments