BMW E36 Blog

Professional Car Audio Upgrade Translated

9th May 2008

Professional Car Audio Upgrade Translated


Thanks to Valery for the translation of the Professional Car Audio Upgrade. He is so kind and has translated the whole DIY for us. I’m still confused a little bit about some parts of this DIY because I don’t have much knowledge about fiberglass, but I think the result is awesome! Now, you can understand the procedure easily. Thanks again Valery.

Disclaimer: Use this info at your own risk!! I’m not responsible if this didn’t work for you :-).

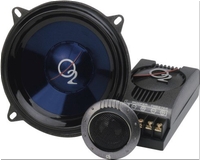
Hi everyone, I’m 19 and I own a E36 325TDS with a lot of extra parts for it so that I modify inside and out a little bit. I installed a Oxygen Alium 5, 13cm diameter Kit and a 20cm Speaker Oxy Alium 203.

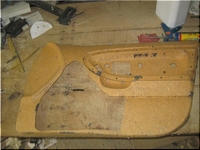
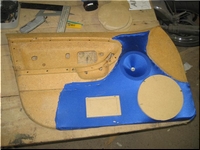
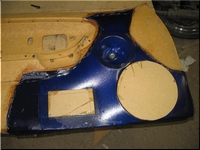
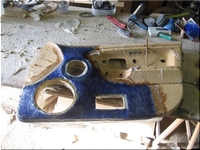
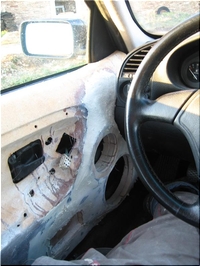
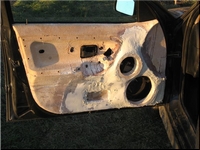
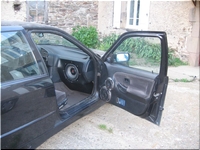
First, I removed the vinyl, and then cut the panel

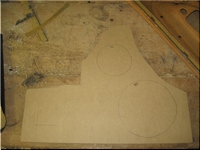
Next, I cut a piece of MDF (Medium Density Foam) of 19mm thick

A little bit of fiber to maintain the MDF. Check out the door:

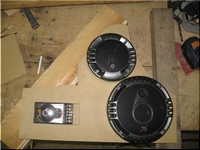
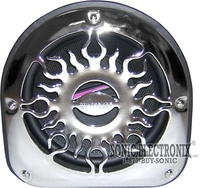
Here is what I used, you’ll tell me “It is not wow” but I couldn’t afford better, these speakers are really good for the price.

Setting the canvas, this is not some cheap fabric :p this is lycra 😉 I know I know 😉 back to work, major advantage of the lycra is its scalability.

Application of resin (What is that? Ken can you help ?):

Once the resin is dry on the fabric, cut a piece of glass fiber as so:

What you get once resin applied:

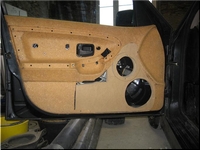
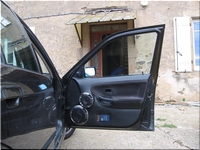
Now the most annoying part of the project 🙁 smooth all of it :s:  I hate doing it lol Here is what you get when installed:

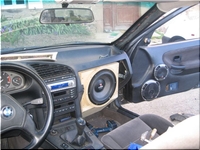
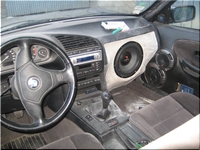
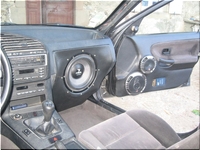
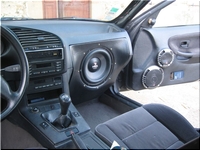
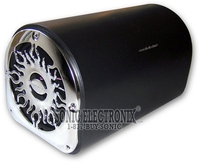
The installation progressed a bit, I replaced my previous kit by a MAC Audio Diamonds 2.13Here are the pics 🙂

So, It’s been a while since I’ve done it, I will soon replace them by a Focal Utopia 136W kit.

My latest project:
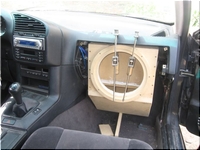
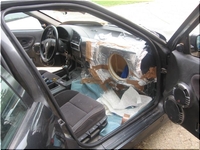
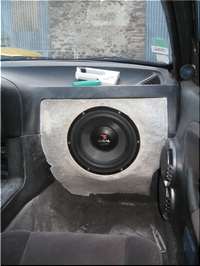
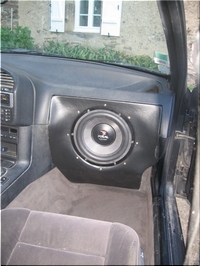
Here is the idea, as you might remember I’ve installed new speakers in my doors, I then realized that I couldn’t open my glovebox anymore lol Anyway, I decided to fit a subwoofer instead of the glovebox.The subwoofer is a Focal 27A, here we go, pictures !

First, build the box in medium 19mm, I reached a volume of 15L. I had to take out the fan system to gain space and pack everything to fit it in.

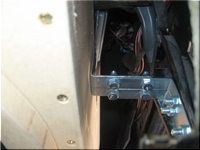
Fixing plate to hold it

What It looks like after the Subwoofer is inserted.:

Application of the canvas to get a good shape.

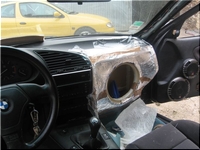
I then used foil to unmould the shape I got, made of fiber.

What you get with 3 layers of fiber. Where I am right now.

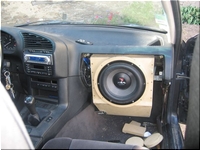
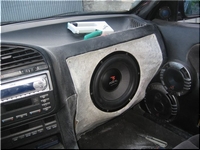
Smooth the whole thing and black vinyl, with golden screws. Check out the result


Are you looking for more do it yourself procedures (DIY) ? I recommend the Bentley BMW 3 series service manual for you. I got it and I think it’s a gold mine for us -BMW E36 Owners-. If you didn’t grab your copy yet, get it right now! I’m sure you’ll find this book worth every penny you’ve paid for. Get the Bentley BMW 3 series service manual

BMW E36 Blog: The ultimate BMW E36 information source.

Want to receive exciting tips & information about BMW E36 cars? Enter your Email:-


posted in Audio, Do It Yourself, Tips & Tricks, Uncategorized | 5 Comments

8th May 2008

Professional Car Audio Upgrade


Hello,

Hicham was so kind to send me a link which contains a description of how to upgrade your BMW E36 car audio in a very professional way. You can check the thread here. Unfortunately, it’s in French and because I don’t know French, I had to figure this thread out using the pictures included. I’m confident you’re going to like this very much. I included here some photos that may explain the procedure, but for those of you who understand French, you can refer to the thread I pointed out. Also, it would be great if you can translate some of the text there and post it here as a comment. That would help us understand this more. Thanks Hicham for the link.

Take a look:


BMW E36 Blog: The ultimate BMW E36 M3 information source.

Want to receive exciting tips & information about BMW E36 cars? Enter your Email:-


posted in Audio, Photos, Tips & Tricks, Uncategorized | 3 Comments

27th January 2008

Anti-Theft Wheel Locks For Your BMW


Let’s admit it! Thieves are just not going to back off any time soon and it’s almost like they’re getting smarter and smarter every day. They’ve been steeling cars and car alarms became a must now for almost any car. They have been steeling sound systems and expensive subwoofers/amplifiers and head units. Now, it’s your car wheels. When you’re driving a car with expensive wheels, many thieves will seriously consider paying you a visit. It’s getting very common to hear about stolen wheels on cars (specially expensive ones). This is a real problem although the solution can be very simple and very cheap. It’s called "wheel locks". The idea behind this is to change one bolt on each wheel of your car with one of the bolts provided by this kit. These bolts can’t be loosened without a special key (provided with the kit). This way, when a thief pays you a visit and tries to unscrew your wheel bolts, the secure bolt will tell him "SURPRISE . . . YOUR TOOL DOESN’T WORK ON ME YOU MORON". I think this a very good tool to use in case you have expensive wheels that you want to protect against theft.


Anti-Theft Wheel Locks For Your BMW


BMW E36 Blog: The ultimate E36 information source.


Want to receive exciting tips & information about BMW E36 cars? Enter your Email:-


posted in Technical Info, Tips & Tricks | 2 Comments

9th January 2008

Upgrade Your Car Audio System Easily


I used to have a BMW E30 with a sound system before I got my BMW E36 318is car. The sound system had a Sony Xplod head unit, Kenwood Speakers, Kenwood subwoofer and Boschmann Amplifier. I really miss that sound system sometimes. It had a magnificent sound with a deep bass that I used to really enjoy. Since I had my new E36, I don’t enjoy my music like I used to simply because I don’t have high quality sound system. I wrote previously about installing Pioneer speakers inside my car without cutting through metal. This gave my audio system a push, but I still don’t like the sound that much. The only logical choice for me was to install a new amplifier and subwoofers to gain the quality I used to have, but since I love my new car and I don’t want to cut through metal, I decided not to get those big subwoofers. I also hate to fill my trunk with a sound box too, so I throw both solutions out of the window. Yesterday, I was looking for some audio upgrades and I’ve found this Audiobahn Enclosures (Subwoofer + Amplifier). Take a look:


These cuties have:
1. Small Space: So, I don’t have to cut through metal anymore and I don’t need to put it in my trunk either. I will just put it on the rear seat which I don’t use that often.
2. Integrated 120Watts Amplifier: Cool!
3. Nice looking box: OK, I hate the chrome a little bit, but what can I say, life is not perfect!
4. The kit costs $157

Take a look at the kit:


It has:
Subwoofer, 120W Amplifier, Bass Control Knob, RCA Inputs. Everything you need to install them!

I think this choice is awesome! You upgrade your audio system with bass and without the headache. I hope you like it, I think it’s brilliant.


BMW E36 Blog: The ultimate BMW E36 M3 information source.


Want to receive exciting tips & information about BMW E36 cars? Enter your Email:-


posted in Audio, Tips & Tricks | 1 Comment