BMW E36 Blog

Upgrade Your Car Audio System Easily

9th January 2008

Upgrade Your Car Audio System Easily


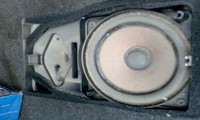
I used to have a BMW E30 with a sound system before I got my BMW E36 318is car. The sound system had a Sony Xplod head unit, Kenwood Speakers, Kenwood subwoofer and Boschmann Amplifier. I really miss that sound system sometimes. It had a magnificent sound with a deep bass that I used to really enjoy. Since I had my new E36, I don’t enjoy my music like I used to simply because I don’t have high quality sound system. I wrote previously about installing Pioneer speakers inside my car without cutting through metal. This gave my audio system a push, but I still don’t like the sound that much. The only logical choice for me was to install a new amplifier and subwoofers to gain the quality I used to have, but since I love my new car and I don’t want to cut through metal, I decided not to get those big subwoofers. I also hate to fill my trunk with a sound box too, so I throw both solutions out of the window. Yesterday, I was looking for some audio upgrades and I’ve found this Audiobahn Enclosures (Subwoofer + Amplifier). Take a look:
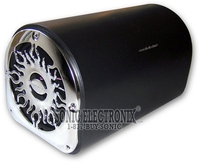

These cuties have:
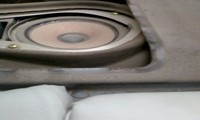
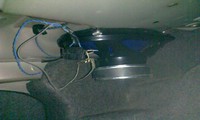
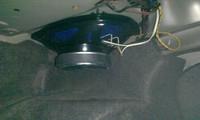
1. Small Space: So, I don’t have to cut through metal anymore and I don’t need to put it in my trunk either. I will just put it on the rear seat which I don’t use that often.
2. Integrated 120Watts Amplifier: Cool!
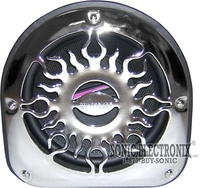
3. Nice looking box: OK, I hate the chrome a little bit, but what can I say, life is not perfect!
4. The kit costs $157

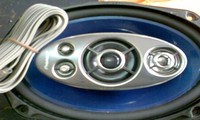
Take a look at the kit:
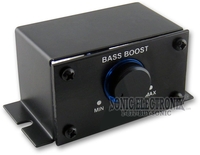


It has:
Subwoofer, 120W Amplifier, Bass Control Knob, RCA Inputs. Everything you need to install them!

I think this choice is awesome! You upgrade your audio system with bass and without the headache. I hope you like it, I think it’s brilliant.


BMW E36 Blog: The ultimate BMW E36 M3 information source.


Want to receive exciting tips & information about BMW E36 cars? Enter your Email:-


posted in Audio, Tips & Tricks | 1 Comment

27th January 2007

Installing stock speakers inside your BMW E36 without making any damages!

Hi Friends,


As I promised you, I’m writing today about how I upgraded my BMW E36 sound system without doing any damages to my car. I was not happy with the standard sound in my car as I kept recalling the sound system that I used to have in my previous BMW E30. It was a sound system with (Kenwood speakers, Subwoofers, Boschmann amplifier and a Sony Xplod headset with a CD changer). So, I wanted to do a similar change to my new car, but I didn’t want to make any damages to the car as I had to cut through the metal to place the speakers and the subwoofers in my old car. I found a new way which I think it’s away better than the old one and I’m going to explain it with photos next . So enjoy and I hope you’ll find this article very interesting.


Disclaimer: Use this procedure at your own risk and don’t blame me of any trouble 😉


With that said, we can start now. . .


The first thing that I had to do with is to remove the covers that BMW used to hide the rear speakers. By using a screwdriver, you can easily do that but you have to be careful in order not to break them. After you remove that cover, you’ll be able to see the rear speakers. See screenshot below:


and this one:


Now, after your see this, you can use the screwdriver again to remove the 2 screws that hold each of the rear speakers. After you remove the screws, you can easily remove the rear speakers, but you should do that from the trunk side, not from the room side. Don’t forget to unplug the speakers first, see screenshot below:


Now that you’ve removed the speaker, it’s time to put the new speakers. See screenshots below:


Now, you have to remove the speakers cover, like screenshots above. This will give you the ability to stick the rounded area of the speaker which holds the small speakers (Tweeters) in the whole of the original speakers.


After that, you’ll have to use the drill to make two small wholes (or four) from the trunk side for each speaker to hold it using screws. This was a little bit hard for me because there’s no much space in the trunk to do it, but after some hard tries/fails, I successfully did it.


The next step is to connect the wires of the original plug of each speaker to the new one. After you do this, it should look something like the screenshots below:


So, now we have the speakers placed in the trunk and without cutting anything in the car steel. After that, you should put the rear covers back in the same way your removed them (from the car room side) and everything will be done.


In the next few days, I will be writing about connecting the new CD headset. I’m putting these photos for the headset after it’s installed for you to see.


So what do you think? I’ve tried the new sound and it’s so cool. Of course, there’s more to do to get a very good sound, but the budget is out now, so I will have to wait before proceeding with this.


Are you looking for more do it yourself procedures (DIY) ? I recommend the Bentley BMW 3 series service manual for you. I got it and I think it’s a gold mine for us -BMW E36 Owners-. If you didn’t grab your copy yet, get it right now! I’m sure you’ll find this book worth every penny you’ve paid for. Get the Bentley BMW 3 series service manual


I’m done for today, see you soon guys.


Wait for more on … BMW E36 Blog.


best regards,

Tony Sticks.

Want to receive exciting tips & information about BMW E36 cars? Enter your Email:-


posted in Audio, Do It Yourself, Technical Info, Tips & Tricks | 19 Comments