BMW E36 Blog

BMW E36 OBC Showing -35F or -37C Temperature

14th May 2008

BMW E36 OBC Showing -35F or -37C Temperature


I published the post Faulty temperature sensor in BMW E36 long time ago. The post talked about the reason why your OBC shows a wrong external temperature like -35F or -37C. At the time of writing that post, I was going to replace the sensor and to my surprise I found that it’s missing. Luckily the wires where hanging there. It seems that someone thought it’s not necessary and this car will not need it. Anyway, somehow I forgot the whole thing and it took me until today to actually get a new one (used) :p , take a look below:

Poor sensor 😀 . The wiring was very easy, just connect the sensor wires to the wires inside your brake duct and you’re set.

After I connected the temperature sensor, I thought the car will show the temperature right away, but it took some time until it started showing the correct temperature. First it started like this -37C , then  gradually increasing until it reached 0C then it started going up until it reached 30C.

It’s very nice to fix this problem and very easy at the same time, so if you have this problem in your car, I don’t think you should wait like I did. Just get the temp sensor and fix it.


BMW E36 Blog: The ultimate BMW E36 M3 information source.

Want to receive exciting tips & information about BMW E36 cars? Enter your Email:-


posted in Interior, Technical Info, Tips & Tricks, Uncategorized | 3 Comments

11th May 2008

BMW E36 With E30 Side Mirrors


I have to admit that I never liked the stock BMW E36 (Not the M3) side mirrors. Every time I look at them, I find them a little bit ugly and doesn’t exactly fit my idea of BMW styling. Well, before you ask, I’m not an expert in car design, but it’s my opinion. On the other hand, I absolutely love the M-Tech side mirrors and they look just awesome. The problem is that if your car doesn’t have a body kit, you won’t be able to install these mirrors because they won’t mach the rest of the car.

To solve this problem, I suggest you consider the E30 side mirrors. Yes, you heard right, E30, not E36. If you’re not familiar with the E30 mirrors, they look great and their design is much better than the stock E36 ones. I love their design very much!

Today, I’ve found this photo of a BMW E36 with E30 side mirror. Unfortunately, it’s not clear enough, but it shows that the E30 mirrors will fit the E36 style even better than the stocks ones.

Take a look at this, don’t you agree?

I’m not sure how hard would it be to fit such mirrors in a BMW E36, but at least you know now that someone else did it already. So, it’s possible.

I will try to find a DIY (Do It Yourself) and I hope I will be able to find one to do just that.


BMW E36 Blog: The ultimate BMW E36 M3 information source.


Want to receive exciting tips & information about BMW E36 cars? Enter your Email:-


posted in Exterior, Photos, Tips & Tricks, Uncategorized | 3 Comments

29th March 2008

Fixing BMW E36 Trip Odometer LCD . . . DIY!


I have mentioned in my previous post Turning Your BMW Lights On Automatically At Night . . . System Testing that while I was trying to get the auto light inside my E36 to work, I’ve burned something. Actually, what I have burned was the Trip Odometer LCD light. At first, I thought this is something really serious and that I have to pay some serious bucks to solve the problem, but after some research, it turned out that it’s actually a bulb in the cluster that needs to be replaced. Piece of cake, right? So, I followed the steps in Installing Silver Gauge Cluster Rings for your BMW . . . DIY! post to remove the gauge cluster. It’s a really good DIY (Do It Yourself). Anyway, please follow these steps for a quick guide on how to do this nice fix.

Disclaimer: Use this info at your own risk!! I’m not responsible if this didn’t work for you :-).

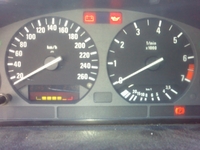
Take a look at my Trip Odometer LCD light. It’s not working and my cluster looks really bad and ugly. Isn’t it?
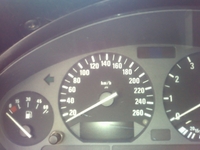
To start the fix, you will need to remove the gauge cluster. You can start by removing the screws that hold the gauge cluster. There are two of them at 11 & 1 clock. Take a look at these:
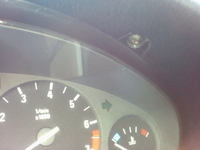
When you remove the screws, simply push the bottom of the cluster to the back a little bit and it will move. After that you will need to pull it slowly and carefully. The ultimate target is to slide the gauge cluster from behind the steering wheel like this:
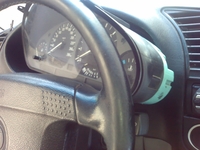
You will notice that there are some wires that are connected to the cluster and they will prevent you from sliding the cluster out. There are three of them, one on the right and two on the left. Take a look at the following (it’s the one on the right)
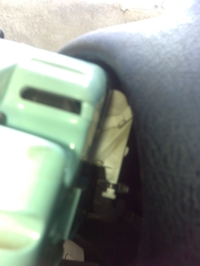
Before removing it, please disconnect your battery. I didn’t disconnect it and a warning sound started out. I don’t know what this sound was, but it was really annoying. So, I say unplug your battery to make sure the process goes as smooth as possible.

IMPORTANT: If you have the OEM radio from BMW, do NOT disconnect your battery unless you’re 100% sure that you have the PIN code that can unlock your radio.

Removing the three wires is a real pain and they need a lot of attention, but eventually you can do it. When you unplug these wires, you will be able to slide the gauge cluster out. Now turn it and look at the back, here’s the light that needs to be replaced.
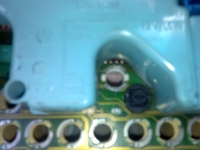
Using a flat screwdriver, you can remove that light. Now, here’s a thing that really shocked me. I had the light that I’m going to use as a replacement right here and these lights are usually just pull-out and put the new one instead PERIOD. Surprisingly, this was not the case here. The light was stuck and not going to be pulled out easily as I previously thought, so I had to remove it from it’s plastic cavity to find out that the light bulb is connected to the light connectors. Take a look:-
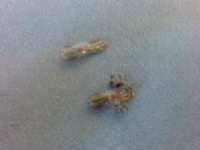
God damn it! So, I thought, ok lets cut the old bulb wires and solder the new wires instead, but to my surprise AGAIN 🙁 , it didn’t hold. So I finally was able to squeeze the new bulb inside the plastic cavity in a way its wires will be connected to the steel connectors. After that, I tested the bulb and it worked.

Alright, now the nightmare has ended! So, I put everything back in the reverse order and here’s the result. A clear trip odometer LCD . Awesome!
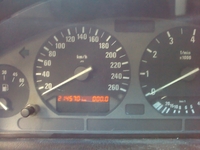
So, what do you think? Isn’t that a cool fix or what?


Are you looking for more do it yourself procedures (DIY) ? I recommend the Bentley BMW 3 series service manual for you. I got it and I think it’s a gold mine for us -BMW E36 Owners-. If you didn’t grab your copy yet, get it right now! I’m sure you’ll find this book worth every penny you’ve paid for. Get the Bentley BMW 3 series service manual

BMW E36 Blog: The ultimate BMW E36 information source.


Want to receive exciting tips & information about BMW E36 cars? Enter your Email:-


posted in Do It Yourself, Electrical, Technical Info, Tips & Tricks, Uncategorized | 17 Comments

29th February 2008

Fixing BMW E36 Light Switch Illumination . . . DIY!


As I promised in my previous post, Top Gear BMW M5 Review, I prepared a DIY (Do It Yourself) to show you how to fix your BMW E36 light switch illumination. This is a very very common problem in BMW E36 cars and it always goes unnoticed. Having illumination in the BMW E36 light switch looks great and if you can’t see that illumination in your dashboard, this means that this DIY is for YOU. I hope you enjoy it and find the information provided below useful.

Disclaimer: Use this info at your own risk!! I’m not responsible if this didn’t work for you :-).

The illumination of your light switch can be fixed easily and it costs nothing. Well, only a dollar to buy the correct light bulb to use for replacement. To start, take a look at this:

Now, at the bottom of this is a screw that you will need to remove. After that, you can remove the light switch and the air vent easily. Take a look at the screw here:

After you remove that screw, you will need to use a flat screw driver to push the whole light switch + air vent out. Be careful with this to avoid breaking anything. The whole part should be removed by pulling a little bit. You can pull it by hand by grabbing the light switch and the air vent opening. Just apply a little effort and it should come lose. After you remove the switch and the air vent, you will not be able to remove it totally out of its place. That’s because it’s connected by two wires that will need to be disconnected first. Take a look at the connectors that need to be removed:

To remove the light connecter you should turn it anti-clockwise (from your point of view). Be careful with this, the wires are very short and you will need to use your fingers to turn the connector. It’s a little bit tight place to work with. After you finish it, you will have the whole part (light switch + air vent) out like this:

This is where you will find the pin that is holding the light bulb that needs to be replaced. Take a look:

You will need to use a flat screw driver to remove the pin out of its place. Pay attention not to break anything ok? After you remove the pin, it should look something like this:

This is the light bulb that needs to be replaced. I brought another type of bulb by mistake thinking that these small bulbs are all of standard size. It turned out that I was wrong, so I had to go and get a different one. Take a look:

After you replace the bulb, put everything back the way your removed them. It’s going to be a little bit hard to reconnect the wires to the light switch, but don’t worry, you will be able to do it with a little patience and concentration.

After you connect the wires, you should try to place the air vent + the light switch back and you will notice that it’s not fitting exactly. That’s because you will need to make sure the opening of the air vent will slide in its place correctly. Just keep moving it a little bit up and down while pushing it gently. It will slide in and everything should look good now. Now turn your lights on and see if it’s working. If you’ve successfully accomplished the task, your light switch should look like this at night 😆

So, what do you think? Isn’t that a cool fix or what?


Are you looking for more do it yourself procedures (DIY) ? I recommend the Bentley BMW 3 series service manual for you. I got it and I think it’s a gold mine for us -BMW E36 Owners-. If you didn’t grab your copy yet, get it right now! I’m sure you’ll find this book worth every penny you’ve paid for. Get the Bentley BMW 3 series service manual

BMW E36 Blog: The ultimate BMW E36 information source.


Want to receive exciting tips & information about BMW E36 cars? Enter your Email:-


posted in Do It Yourself, Electrical, Interior, Uncategorized | 20 Comments

3rd December 2007

Changing BMW E36 Microfilter . . . DIY!


Hi, I’ve found this DIY (Do It Yourself) about how to replace your BMW E36 Microfilter and I thought I should share it with you guys. For those of you who may be unfamiliar with the microfilter. It’s the part which is responsible for cleaning (filtering) the air which is going inside the car from outside while your fan (or condition A/C) is running. I hope you find it useful. Finally, I just want to thank old skool the original author of this DIY.


Disclaimer: Use this info at your own risk!! I’m not responsible if this didn’t work for you :-).

IMPORTANT: This DIY is based on left hand drive cars. If you have a right hand drive E36, you’re supposed to access the filter from the right, not from the left

The first step is to remove the glovebox. Read here about Removing BMW E36 Glove box

After the glovebox is removed, you will want to remove the plastic air vents that feed the footwell in order to gain better access to the microfilter compartment.

To do this you need to push down on the back of the plastic vents to release a vertical clip holding it up. You can see it in this picture:

Just forward of the purple wire in the clear plastic covering you see a vertical post near where the plastic is coated with insulation.

The second clip can’t be seen as it is on the underside of the vents inside the vent right at the center of the car. To remove this press up from the bottom until it pops out and then pull away from the center of the car to release the snap fitting of the vent and then wiggle it out and towards the front of the car to clear the metal frame that it is tightly fitted into.

Now you have to remove this. There is a release clip at the top center. Pull left in the picture and then push up on the unit to remove it.

Here it is removed and you can see the release clip in the middle and the other two slide clips on either side.

(Some people have another black tray attached to the top of this clip. You will have to remove the top tray first. In order to do this, you slide the top tray back as far as it will go and then lift up. You can see the 3-4 sets of grooves in this picture. Installation is the opposite of removal.)

Here is the console it fits into. You can see how it attaches.

Now this is the access to the microfilter. Up is the front of the car, right is the floor, left is the hvac core.

Twist this and pull it out to expose the microfilter.
Push the black tab shown on the filter towards the front of the car to release the foam seal. Then pull away from the center of the car to remove it. The frame is broken in three places and will make a bit of a mess…just keep pulling and working at it until it is removed.

here it is. Yuck!

To insert the new one, simply break it in the three obvious place on the plastic frame so that you can carefully feed it in the opening and clear all the components under the dash. When it is in, just press it towards the front of the car to fit the foam seal. Reinstall the cover and twist in the opposite direction to secure it. Then simply reinstall all the pieces of the dash.


Are you looking for more do it yourself procedures (DIY) ? I recommend the Bentley BMW 3 series service manual for you. I got it and I think it’s a gold mine for us -BMW E36 Owners-. If you didn’t grab your copy yet, get it right now! I’m sure you’ll find this book worth every penny you’ve paid for. Get the Bentley BMW 3 series service manual

BMW E36 Blog: The ultimate BMW E36 information source.

Want to receive exciting tips & information about BMW E36 cars? Enter your Email:-


posted in Do It Yourself, Interior, Technical Info, Tips & Tricks | 8 Comments