De-Lensing BMW E36 Headlights … DIY
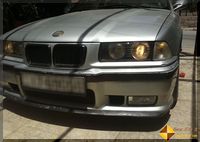
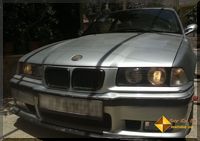
I’ve seen many good looking BMW E36 cars and I always noticed that they have one thing in common. It’s the standard Bosch headlights, but for some reason, the headlights looked a little bit weird. These headlights were actually delensed.
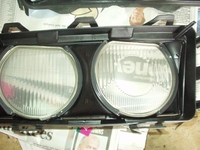
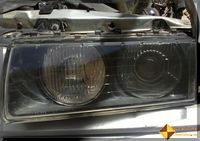
The Bosch original headlights have lenses that will help move the light in the correct directions. Unfortunately, these make the headlights (and the car) look ugly.
I thought that de-lensing is a hard job to do and honestly, I was worried that the result isn’t worth it. After I read about it and found that the job is easy and totally reversible (which is a major point to me), I thought I would give it a try. This is what I did:
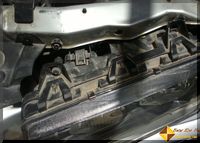
1. First, I had to remove the headlights so that I can work on them easily. To do that, I had to start by removing the corner lamps or signal lights. Simply, use a screwdriver to pry the clip that holds the signal light to the main headlight. Then slide it forward carefully.
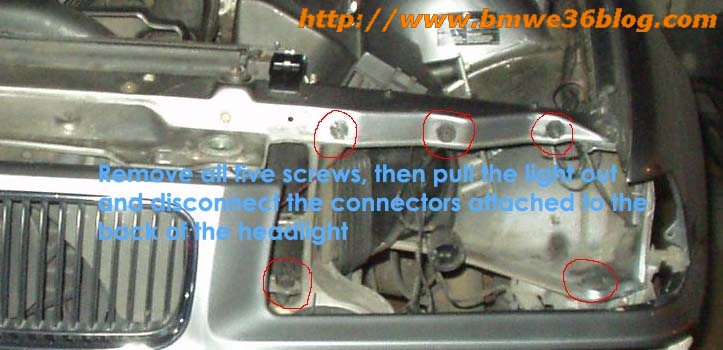
2. After that, I removed the headlights. It’s an easily job. You can simply reverse what I’ve done in my previous Replacing BMW E36 Headlights post. Just keep in mind that there are 5 screws that hold the headlight. 3 at the top and 2 at the bottom. Remove the screws and slide the headlight forward a little bit so you can disconnect the sockets from the back of the headlight.
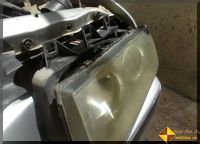
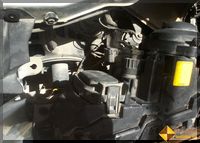
After that, remove the headlights completely and put them at a table so you can work on them safely.

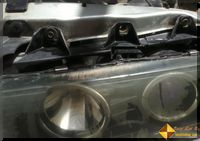
3. On each headlight, there are 5 big plastic clips (3 on top and 2 on the bottom). With a flat-head screwdriver, unhook them CAREFULLY. As soon as you’re done, the front part of the headlight should come off.
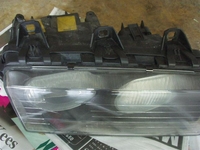
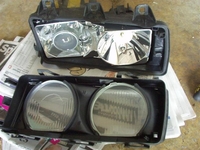
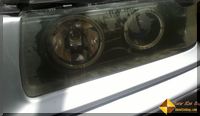
4. Take a breath and enjoy checking out the reflectors at the back part of the headlight. When the lenses come off, the reflectors will be easier to see from the front of the car which is going to be a sweet look.
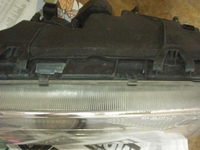
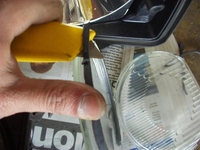
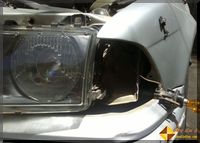
5. Notice that both lenses are held in by factory silicone. Using a blade, slice them off. Your lenses should now fall out quite easily. If they don’t, you can use a flat-head screwdriver to gently nudge it out. Be very, very careful!
IMPORTANT: you must keep those lenses (2 on each headlight) in a safe place in case you decide to go back to the old look.
6. Clean the insides of the headlight thoroughly. I sprayed window cleaner then used newspaper to wipe it clean. You may want to wipe the reflector for the low beam as well. I didn’t do that though because it was very clean.
7. Now, hook the front part of the headlight to the rear part carefully (without the lenses of course), and then, put everything back the way it was. Now, you have de-lensed your BMW E36 headlights… Congrats!
8. Last part of this DIY. Did “LIKE” our BMW E36 Blog page on Facebook? If you haven’t done so yet, please do now. Just click the “LIKE” button below this.
Please leave a comment about whether your car looks better this way or before de-lensing it?
BMW E36 Blog: The Ultimate BMW E36 Information Source.

Want to receive exciting tips & information about BMW E36 cars? Enter your Email:-
posted in Do It Yourself, Exterior, Technical Info, Tips & Tricks, Uncategorized | 1 Comment


 (4.86 out of 5)
 (4.07 out of 5)


