If you’re thinking about replacing your BMW E36 M42 or M44 spark plugs, then this DIY (Do It Yourself) is for you. It was written by Olaf Johnson. The procedure is very clear and the pictures are just fabulous. I hope you will find it useful. Thanks Olaf.
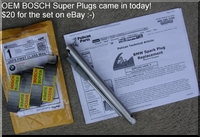
I ordered my set off eBay for $20 free shipping. The dealership wanted $13.95 per plug. I decided to stick to OEM and be simple since this was my first time doing this DIY. I started the car before so I could take note of how the car started before changing the plugs (listen to sound, vibration and start speed).
Start with a cold engine; Get out your tools from the BMW Tool Tray in the trunk. If your tray is empty or molested with as is the case with buying used cars you can buy the two tools from the dealership for $20 or so or get it at eBay or the junkyard for cheap. I’m not sure if other spark plug tools are compatible with these cars.
Removal of the cover to get to the wire set that caps the plugs is easy on the M42/M44 E36 Engines.
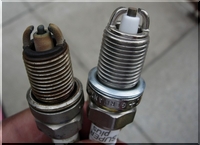
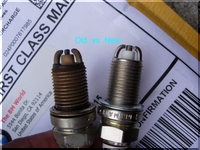
OEM Bosch Super Plugs
I finally get to use these tools. This one is the spark plug wrench
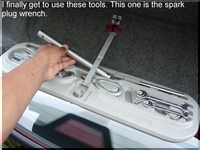
Next get the wrench’s twister thingy that allows you to turn the wrench.

Open this by turning the two circles so the slits are vertical.

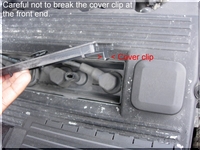
Careful not to break the cover clip at the front end.
Find your smurf tool and begin pulling the wire set caps off each plug. Start at the front (hole #1) where you can see better and have more room to maneuver.
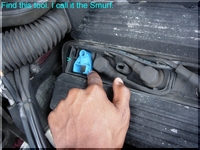
Use it to pull out the plug wire set. Start at the front since it is easier to get to and see what you are doing.

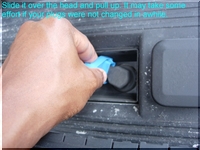
Slide it over the head and pull up. It may take some effort if your plugs were not changed in a while.
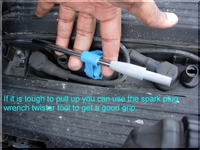
If it is tough to pull you can use the spark plug wrench twister tool to get a good grip.
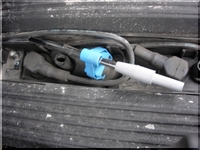
The cap comes off easily and you will see the hole that the plug sits in. Go to work with your wrench. If your plugs are old and haven’t been changed in awhile get ready to put some elbow grease in. Also remember to turn counter-clockwise to remove the plugs. Be careful not to damage the plug threading or the holes threading that the plug screws into or you could seriously damage your engine (ie. The engine will need to be replaced). So no power tools for this DIY!!! The plugs are also screwed in deep so be prepared to be standing there twisting for a few minutes until the plug releases.
Hole #1: You will hear a nice suction pop when the wire set cap is released from the hole.

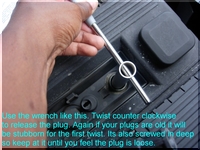
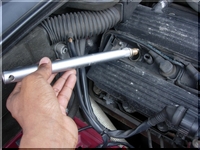
use the wrench like this. Twist counter clockwise to release the plug. Again if your plugs are old it will be stubborn for the first twist. It’s also screwed in deep so keep at it until you feel the plug is loose.
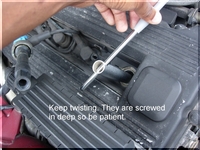
Keep twisting. They are screwed in deep so be patient.
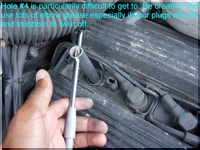
Hole #4 is particularly difficult to get to. Be creative and use lots of elbow grease especially if your plugs are old and stubborn to twist off.
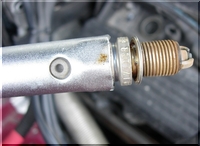
The Spark Plug Wrench should grip the plug when you are done screwing it loose. Just lift the wrench up and the plug will come out with the wrench. Inspect the old plug, clean the hole* if it is dusty or oily and replace with the new plug and spark plug wire set cap for that hole before moving onto the next hole.
Note: If you have air-in-the-can you should blow any dust or debris out the hole before removing the old plug. You DO NOT WANT to get anything into the hole or chamber that lies below the plug. So once the old plug is out DO NOT clean or put anything down there. It may get into your chamber and damage the engine. And that is a trip to the dealership you do not want to make since a new engine will run you $5,000 to $8,000 plus the labor cost at around that much.
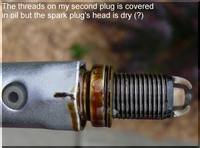
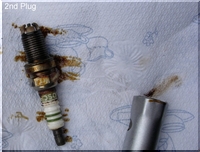
Some of your plug holes may be covered in oil and may look like this when you pull them out. A little bit of oil should be fine for now like I have here in my 2nd plug hole, but a lot of oil and you should replace the Valve Head gasket as soon as you can which is an easy DIY.
The threads on my second plug is covered in oil but the spark plug’s head is dry ?!
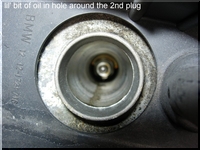
Inside second plug’s hole after the plug is removed notice oil trail. There was no oil deep inside the hole, and at best I could only see oil on the ledge.
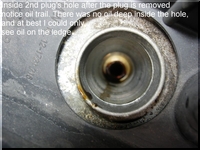
Second plug:
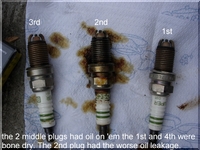
Two of my middle plugs at hole#2 and #3 had oil in them, with 2 being the worse. Oddly enough, the oil was only on the top half and the threads of the plug but there was absolutely no oil on the business end of the plug a.k.a the spark plug head
When you are done you can inspect the old plugs for clues as to what is going on inside your engine block. I haven’t worked out how to read plugs yet, but I will read up on it later. You can easily Google this info.

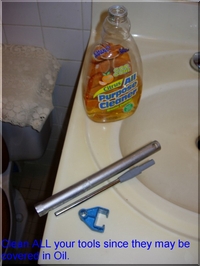
When you are done clean your tools and put everything back and start your car and listen to the engine and note the start up time. Does it sound/start better?
Are you looking for more do it yourself procedures (DIY) ? I recommend the Bentley BMW 3 series service manual for you. I got it and I think it’s a gold mine for us -BMW E36 Owners-. If you didn’t grab your copy yet, get it right now! I’m sure you’ll find this book worth every penny you’ve paid for. Get the Bentley BMW 3 series service manual


 (4.86 out of 5)
 (4.07 out of 5)


