I have mentioned in my previous post Turning Your BMW Lights On Automatically At Night . . . System Testing that while I was trying to get the auto light inside my E36 to work, I’ve burned something. Actually, what I have burned was the Trip Odometer LCD light. At first, I thought this is something really serious and that I have to pay some serious bucks to solve the problem, but after some research, it turned out that it’s actually a bulb in the cluster that needs to be replaced. Piece of cake, right? So, I followed the steps in Installing Silver Gauge Cluster Rings for your BMW . . . DIY! post to remove the gauge cluster. It’s a really good DIY (Do It Yourself). Anyway, please follow these steps for a quick guide on how to do this nice fix.
Disclaimer: Use this info at your own risk!! I’m not responsible if this didn’t work for you :-).
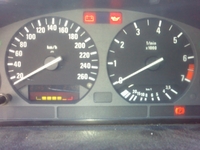
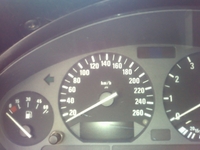
Take a look at my Trip Odometer LCD light. It’s not working and my cluster looks really bad and ugly. Isn’t it?
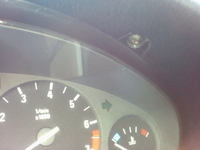
To start the fix, you will need to remove the gauge cluster. You can start by removing the screws that hold the gauge cluster. There are two of them at 11 & 1 clock. Take a look at these:
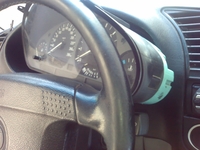
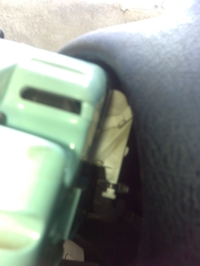
When you remove the screws, simply push the bottom of the cluster to the back a little bit and it will move. After that you will need to pull it slowly and carefully. The ultimate target is to slide the gauge cluster from behind the steering wheel like this:
You will notice that there are some wires that are connected to the cluster and they will prevent you from sliding the cluster out. There are three of them, one on the right and two on the left. Take a look at the following (it’s the one on the right)
Before removing it, please disconnect your battery. I didn’t disconnect it and a warning sound started out. I don’t know what this sound was, but it was really annoying. So, I say unplug your battery to make sure the process goes as smooth as possible.
IMPORTANT: If you have the OEM radio from BMW, do NOT disconnect your battery unless you’re 100% sure that you have the PIN code that can unlock your radio.
Removing the three wires is a real pain and they need a lot of attention, but eventually you can do it. When you unplug these wires, you will be able to slide the gauge cluster out. Now turn it and look at the back, here’s the light that needs to be replaced.
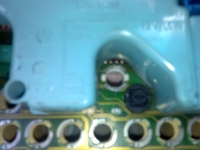
Using a flat screwdriver, you can remove that light. Now, here’s a thing that really shocked me. I had the light that I’m going to use as a replacement right here and these lights are usually just pull-out and put the new one instead PERIOD. Surprisingly, this was not the case here. The light was stuck and not going to be pulled out easily as I previously thought, so I had to remove it from it’s plastic cavity to find out that the light bulb is connected to the light connectors. Take a look:-
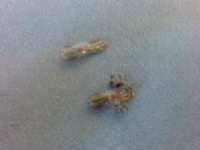
God damn it! So, I thought, ok lets cut the old bulb wires and solder the new wires instead, but to my surprise AGAIN 🙁 , it didn’t hold. So I finally was able to squeeze the new bulb inside the plastic cavity in a way its wires will be connected to the steel connectors. After that, I tested the bulb and it worked.
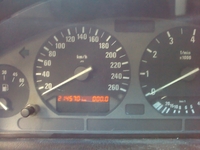
Alright, now the nightmare has ended! So, I put everything back in the reverse order and here’s the result. A clear trip odometer LCD . Awesome!
So, what do you think? Isn’t that a cool fix or what?
Are you looking for more do it yourself procedures (DIY) ? I recommend the Bentley BMW 3 series service manual for you. I got it and I think it’s a gold mine for us -BMW E36 Owners-. If you didn’t grab your copy yet, get it right now! I’m sure you’ll find this book worth every penny you’ve paid for. Get the Bentley BMW 3 series service manual
BMW E36 Blog: The ultimate BMW E36 information source.


 (4.86 out of 5)
 (4.07 out of 5)


