BMW E36 Blog

Professional Car Audio Upgrade Translated

9th May 2008

Professional Car Audio Upgrade Translated


Thanks to Valery for the translation of the Professional Car Audio Upgrade. He is so kind and has translated the whole DIY for us. I’m still confused a little bit about some parts of this DIY because I don’t have much knowledge about fiberglass, but I think the result is awesome! Now, you can understand the procedure easily. Thanks again Valery.

Disclaimer: Use this info at your own risk!! I’m not responsible if this didn’t work for you :-).

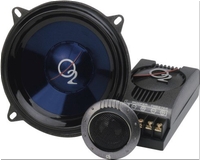
Hi everyone, I’m 19 and I own a E36 325TDS with a lot of extra parts for it so that I modify inside and out a little bit. I installed a Oxygen Alium 5, 13cm diameter Kit and a 20cm Speaker Oxy Alium 203.

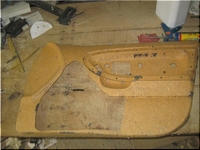
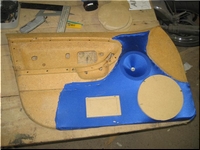
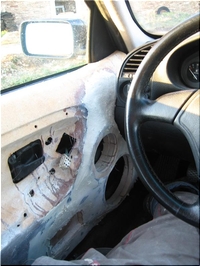
First, I removed the vinyl, and then cut the panel

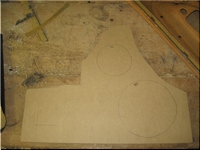
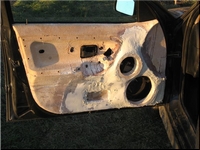
Next, I cut a piece of MDF (Medium Density Foam) of 19mm thick

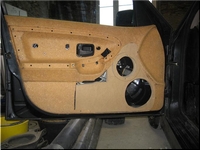
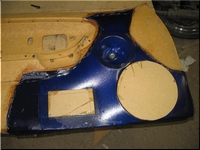
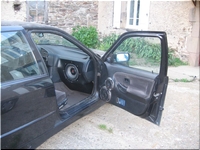
A little bit of fiber to maintain the MDF. Check out the door:

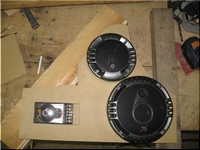
Here is what I used, you’ll tell me “It is not wow” but I couldn’t afford better, these speakers are really good for the price.

Setting the canvas, this is not some cheap fabric :p this is lycra πŸ˜‰ I know I know πŸ˜‰ back to work, major advantage of the lycra is its scalability.

Application of resin (What is that? Ken can you help ?):

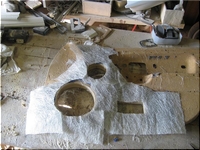
Once the resin is dry on the fabric, cut a piece of glass fiber as so:

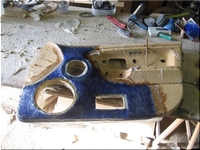
What you get once resin applied:

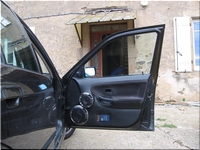
Now the most annoying part of the project πŸ™ smooth all of it :s:  I hate doing it lol Here is what you get when installed:

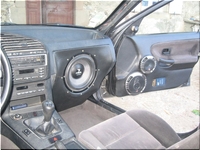
The installation progressed a bit, I replaced my previous kit by a MAC Audio Diamonds 2.13Here are the pics πŸ™‚

So, It’s been a while since I’ve done it, I will soon replace them by a Focal Utopia 136W kit.

My latest project:
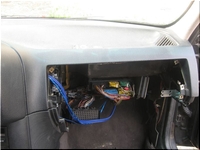
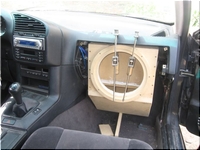
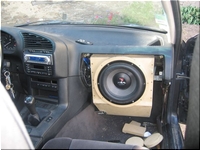
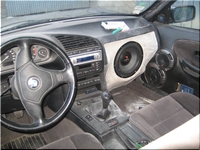
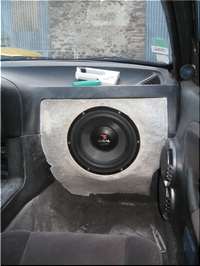
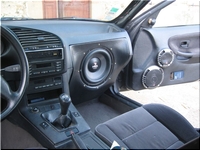
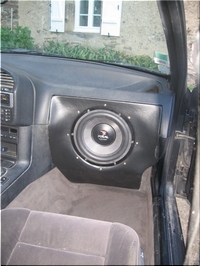
Here is the idea, as you might remember I’ve installed new speakers in my doors, I then realized that I couldn’t open my glovebox anymore lol Anyway, I decided to fit a subwoofer instead of the glovebox.The subwoofer is a Focal 27A, here we go, pictures !

First, build the box in medium 19mm, I reached a volume of 15L. I had to take out the fan system to gain space and pack everything to fit it in.

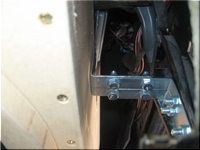
Fixing plate to hold it

What It looks like after the Subwoofer is inserted.:

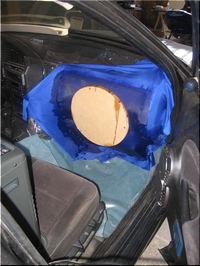
Application of the canvas to get a good shape.

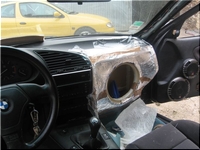
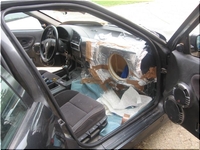
I then used foil to unmould the shape I got, made of fiber.

What you get with 3 layers of fiber. Where I am right now.

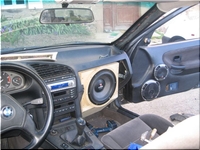
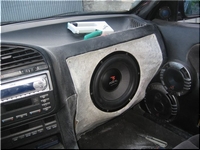
Smooth the whole thing and black vinyl, with golden screws. Check out the result


Are you looking for more do it yourself procedures (DIY) ? I recommend the Bentley BMW 3 series service manual for you. I got it and I think it’s a gold mine for us -BMW E36 Owners-. If you didn’t grab your copy yet, get it right now! I’m sure you’ll find this book worth every penny you’ve paid for. Get the Bentley BMW 3 series service manual

BMW E36 Blog: The ultimate BMW E36 information source.

Want to receive exciting tips & information about BMW E36 cars? Enter your Email:-


posted in Audio, Do It Yourself, Tips & Tricks, Uncategorized | 5 Comments
11th April 2008

Turning Your BMW Lights On Automatically At Night . . . Main light


I wrote six articles until now about how you can make your BMW lights turn on automatically at night. I will summarize these posts for you in case you have missed them. In the first post, I proved that this should be something easy to implement inside a BMW E36 car. In the second post, I presented a circuit diagram that will help you create the electronic circuit that is supposed to control your lights and turn them on automatically when it gets dark. Of course, if you don’t know how to implement such a circuit or you simply feeling too lazy to do it, you can ask some electrician to do it for you. I’m sure he will agree if you paid him $20. In the third post, I wrote about my first attempt to implement this circuit and told you that itÒ€ℒs partially working but it needed some enhancements. In the fourth post, I created a video with the circuit implemented on breadboard and connected directly to my brotherÒ€ℒs car lights. In the fifth post, I soldered the circuit on permanent board and showed you exactly how I intend to use it inside my car. In the sixth post, I posted 4 videos that I shoot while testing the auto light system. In case you didn’t see these videos I suggest you check them first before proceeding.

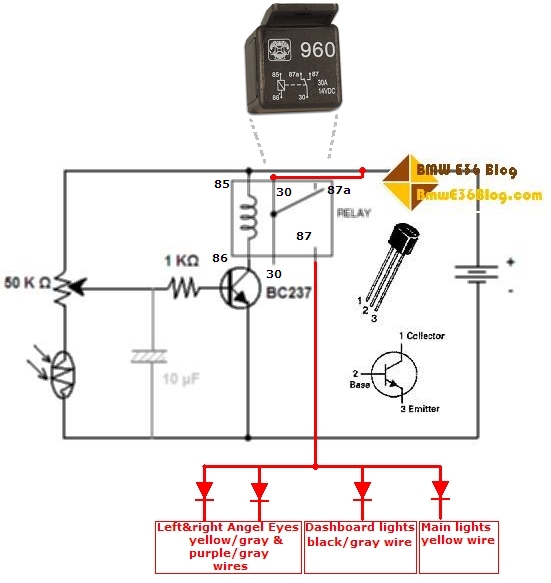
Aright, today, I decided to solve the last problem that I’ve mentioned in the last post, which is main lights problem. I didn’t know previously which wire(s) I should use to turn the main lights on using the auto-light circuit, so my car used to turn the angel eyes lights and the dashboard lights on automatically at night, but not the main lights. As you can see, this is good, but it’s not good enough. So, I decided to try and solve this problem today. To do that, I looked in my Bentley manual and I found the lighting system diagram for the BMW E36. I finally found that I should use the yellow wire to turn the main lights on, so now it should be a very easy task. Take a look at the new wiring diagram for the auto-light circuit. The new modifications are in red:

Please notice that I’ve introduced 4 diodes to get 4 wires out of the relay to be able to control:
1. Left angel eye light (yellow/gray).
2. Right angel eye light (purple/gray).
3. Dashboard lights (black/gray).
4. Main lights (yellow).

The diodes should serve as a precaution measure to prevent the interference between the 4 parts mentioned above.

With this new information, I thought that I’ve figured the solution to my problem, so I decided to go out and connect it to see if it’s going to work or not.

For some reason, when I connect the fourth controller to the yellow wire (main lights), the circuit started to make a buzzing sound (resulting from the relay being switched on and off very quickly) and the headlights turn on and off very quickly too. I’m not really sure about this problem and how to solve it. So, I’m going to review everything I did. The only reason I can think of right now that is causing this problem is that the relay is not suitable for the headlights some how. I’m going to try another relay with larger current limit and see if this solves the problem. If you guys have any idea why this is happening, I would appreciate your comments.

As you can see, this is still unfinished work, so if you want to implement this in your car, I suggest you wait until I figure out the solution for this problem to avoid paying for parts and work that is not proven to be 100% successful yet.


BMW E36 Blog: The ultimate BMW E36 M3 information source.


Want to receive exciting tips & information about BMW E36 cars? Enter your Email:-


posted in Do It Yourself, Electrical, Technical Info, Uncategorized | 8 Comments

29th March 2008

Fixing BMW E36 Trip Odometer LCD . . . DIY!


I have mentioned in my previous post Turning Your BMW Lights On Automatically At Night . . . System Testing that while I was trying to get the auto light inside my E36 to work, I’ve burned something. Actually, what I have burned was the Trip Odometer LCD light. At first, I thought this is something really serious and that I have to pay some serious bucks to solve the problem, but after some research, it turned out that it’s actually a bulb in the cluster that needs to be replaced. Piece of cake, right? So, I followed the steps in Installing Silver Gauge Cluster Rings for your BMW . . . DIY! post to remove the gauge cluster. It’s a really good DIY (Do It Yourself). Anyway, please follow these steps for a quick guide on how to do this nice fix.

Disclaimer: Use this info at your own risk!! I’m not responsible if this didn’t work for you :-).

Take a look at my Trip Odometer LCD light. It’s not working and my cluster looks really bad and ugly. Isn’t it?

To start the fix, you will need to remove the gauge cluster. You can start by removing the screws that hold the gauge cluster. There are two of them at 11 & 1 clock. Take a look at these:

When you remove the screws, simply push the bottom of the cluster to the back a little bit and it will move. After that you will need to pull it slowly and carefully. The ultimate target is to slide the gauge cluster from behind the steering wheel like this:

You will notice that there are some wires that are connected to the cluster and they will prevent you from sliding the cluster out. There are three of them, one on the right and two on the left. Take a look at the following (it’s the one on the right)

Before removing it, please disconnect your battery. I didn’t disconnect it and a warning sound started out. I don’t know what this sound was, but it was really annoying. So, I say unplug your battery to make sure the process goes as smooth as possible.

IMPORTANT: If you have the OEM radio from BMW, do NOT disconnect your battery unless you’re 100% sure that you have the PIN code that can unlock your radio.

Removing the three wires is a real pain and they need a lot of attention, but eventually you can do it. When you unplug these wires, you will be able to slide the gauge cluster out. Now turn it and look at the back, here’s the light that needs to be replaced.

Using a flat screwdriver, you can remove that light. Now, here’s a thing that really shocked me. I had the light that I’m going to use as a replacement right here and these lights are usually just pull-out and put the new one instead PERIOD. Surprisingly, this was not the case here. The light was stuck and not going to be pulled out easily as I previously thought, so I had to remove it from it’s plastic cavity to find out that the light bulb is connected to the light connectors. Take a look:-

God damn it! So, I thought, ok lets cut the old bulb wires and solder the new wires instead, but to my surprise AGAIN πŸ™ , it didn’t hold. So I finally was able to squeeze the new bulb inside the plastic cavity in a way its wires will be connected to the steel connectors. After that, I tested the bulb and it worked.

Alright, now the nightmare has ended! So, I put everything back in the reverse order and here’s the result. A clear trip odometer LCD . Awesome!

So, what do you think? Isn’t that a cool fix or what?


Are you looking for more do it yourself procedures (DIY) ? I recommend the Bentley BMW 3 series service manual for you. I got it and I think it’s a gold mine for us -BMW E36 Owners-. If you didn’t grab your copy yet, get it right now! I’m sure you’ll find this book worth every penny you’ve paid for. Get the Bentley BMW 3 series service manual

BMW E36 Blog: The ultimate BMW E36 information source.


Want to receive exciting tips & information about BMW E36 cars? Enter your Email:-


posted in Do It Yourself, Electrical, Technical Info, Tips & Tricks, Uncategorized | 17 Comments

18th March 2008

Turning Your BMW Lights On Automatically At Night . . . Soldering


Before I start this post. There’s one thing that is really confusing me? Why I’m not getting any response for these articles from you guys? Don’t you like to make your car headlights turn on automatically like the 200X cars? Isn’t that cool? Come on people, let me hear what you think good or bad 😈 .

I wrote four articles until now about how you can make your BMW lights turn on automatically at night. In the first post, I proved that this should be something easy to implement inside a BMW E36 car. In the second post, I presented a circuit diagram that will help you create the electronic circuit that is supposed to control your lights and turn them on automatically when it gets dark. In the third post, I wrote about my first attempt to implement this circuit and told you that it’s partially working but it needed some enhancements. In the fourth post, I created a video with the circuit implemented on breadboard and connected directly to my brother’s car lights. The video showed how the car lights turned on when I covered the light sensor with my hand (tricking the sensor to "think" it’s dark). So, the circuit is working correctly as intended.

In this new post, I soldered the circuit on permanent board and the end result looks like this:

I made sure that this circuit has the following:

1. Two wires for power (positive and negative).
2. Two long wires that are connected to the external light sensor. I made them long because I’m still not sure where I’m going to place that sensor. Take a look at this:

3. Three wires connected to an external variable resistor, this will allow us to adjust how sensitive the unit will be for light. Take a look at this:

4. Three wires that will deliver current from the battery directly to the headlights when it becomes dark.

With this circuit implemented, I think I’m ready to integrate this into my car. I hope in the next week, I will post a video here while I’m driving my car under a tunnel and show you how everything will work. :-). But please let me know what do you think of all this? Also, if you have any ideas about where I should put the light sensor, please let me know.

BMW E36 Blog: The Ultimate E36 Information Source.

Want to receive exciting tips & information about BMW E36 cars? Enter your Email:-


posted in Do It Yourself, Electrical, Technical Info, Tips & Tricks, Uncategorized | 2 Comments

14th March 2008

Turning Your BMW Lights On Automatically At Night . . . Video


I wrote three articles until now about how you can make your BMW lights turn on automatically at night. In the first post, I proved that this should be something easy to implement inside a BMW E36 car. In the second post, I presented a circuit diagram that will help you create the electronic circuit that is supposed to control your lights and to turn them on automatically at night. In the third post, I wrote about my first attempt to implement this circuit and told you that it’s partially working but it needed some enhancements.

Today, I had the time to re-implement the circuit that I’ve been talking about and I connected it to the car. Then, I shot this video for the circuit in action. In the video, I tried to put my hands closer to the light sensor to make it "think" it’s night. Take a look at the video and let me know what you all think.

Note: this car is not mine, it’s my brother’s car and it’s dirty as usual πŸ˜† .

Enjoy :-


BMW E36 Blog: The Ultimate E36 Information Source.

Want to receive exciting tips & information about BMW E36 cars? Enter your Email:-


posted in Do It Yourself, Electrical, Technical Info, Tips & Tricks, Videos | Comments Off on Turning Your BMW Lights On Automatically At Night . . . Video