BMW E36 Blog

Fixing BMW E36 Light Switch Illumination . . . DIY!

29th February 2008

Fixing BMW E36 Light Switch Illumination . . . DIY!


As I promised in my previous post, Top Gear BMW M5 Review, I prepared a DIY (Do It Yourself) to show you how to fix your BMW E36 light switch illumination. This is a very very common problem in BMW E36 cars and it always goes unnoticed. Having illumination in the BMW E36 light switch looks great and if you can’t see that illumination in your dashboard, this means that this DIY is for YOU. I hope you enjoy it and find the information provided below useful.

Disclaimer: Use this info at your own risk!! I’m not responsible if this didn’t work for you :-).

The illumination of your light switch can be fixed easily and it costs nothing. Well, only a dollar to buy the correct light bulb to use for replacement. To start, take a look at this:

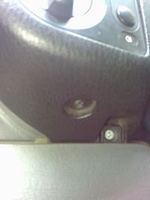
Now, at the bottom of this is a screw that you will need to remove. After that, you can remove the light switch and the air vent easily. Take a look at the screw here:

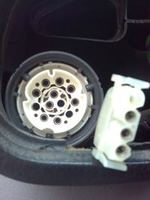
After you remove that screw, you will need to use a flat screw driver to push the whole light switch + air vent out. Be careful with this to avoid breaking anything. The whole part should be removed by pulling a little bit. You can pull it by hand by grabbing the light switch and the air vent opening. Just apply a little effort and it should come lose. After you remove the switch and the air vent, you will not be able to remove it totally out of its place. That’s because it’s connected by two wires that will need to be disconnected first. Take a look at the connectors that need to be removed:

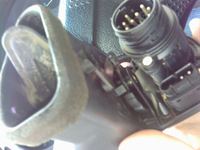
To remove the light connecter you should turn it anti-clockwise (from your point of view). Be careful with this, the wires are very short and you will need to use your fingers to turn the connector. It’s a little bit tight place to work with. After you finish it, you will have the whole part (light switch + air vent) out like this:

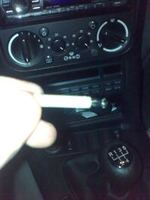
This is where you will find the pin that is holding the light bulb that needs to be replaced. Take a look:

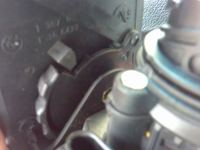
You will need to use a flat screw driver to remove the pin out of its place. Pay attention not to break anything ok? After you remove the pin, it should look something like this:

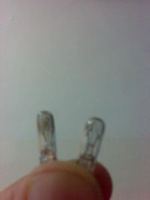
This is the light bulb that needs to be replaced. I brought another type of bulb by mistake thinking that these small bulbs are all of standard size. It turned out that I was wrong, so I had to go and get a different one. Take a look:

After you replace the bulb, put everything back the way your removed them. It’s going to be a little bit hard to reconnect the wires to the light switch, but don’t worry, you will be able to do it with a little patience and concentration.

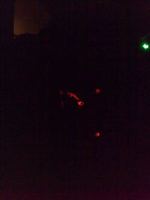
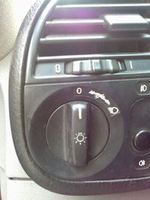
After you connect the wires, you should try to place the air vent + the light switch back and you will notice that it’s not fitting exactly. That’s because you will need to make sure the opening of the air vent will slide in its place correctly. Just keep moving it a little bit up and down while pushing it gently. It will slide in and everything should look good now. Now turn your lights on and see if it’s working. If you’ve successfully accomplished the task, your light switch should look like this at night 😆

So, what do you think? Isn’t that a cool fix or what?


Are you looking for more do it yourself procedures (DIY) ? I recommend the Bentley BMW 3 series service manual for you. I got it and I think it’s a gold mine for us -BMW E36 Owners-. If you didn’t grab your copy yet, get it right now! I’m sure you’ll find this book worth every penny you’ve paid for. Get the Bentley BMW 3 series service manual

BMW E36 Blog: The ultimate BMW E36 information source.


Want to receive exciting tips & information about BMW E36 cars? Enter your Email:-


posted in Do It Yourself, Electrical, Interior, Uncategorized | 20 Comments
24th February 2008

Turning Your BMW Lights On Automatically At Night . . . Implemented


This is the third post in the series of how to create a control device to turn your BMW lights on automatically when it gets dark. In the first post Turning Your BMW Lights On Automatically At Night, we’ve seen how it is possible to control a light using an electronic circuit that is sensitive to light. In the second post, Turning Your BMW Lights On Automatically At Night . . . Circuit Diagram, I presented an electronic diagram that can be used as the light controller inside the car. Of course, everything I said until that post was a theory that I’m almost sure that everyone of you thought it’s impossible or at least hard to implement. At least that explains why I didn’t get any comments on that article which I’m pretty sure it’s very interesting to everyone who drives a BMW E36.

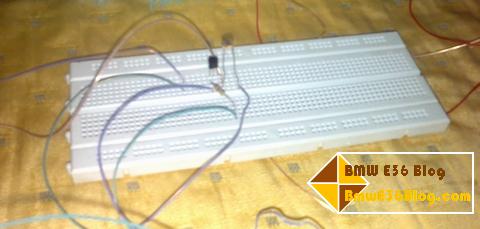
Anyway, I decided to go one step further and try to implement my theory and my electronic circuit to see if it’s going to work or not. So, I brought everything that I mentioned in the second post + breadboard to help me implement the circuit and test it to see how efficient it is going to be. After I put the electronic circuit together, I discovered that the relay is not working :p . So, I had to pull one of the car relays to use it in my test. The circuit on the breadboard looked like this (very simply):

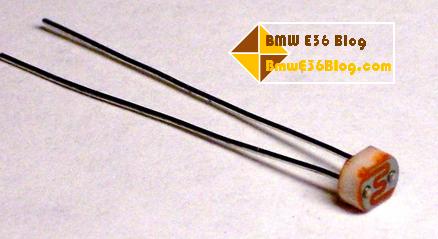
After that, I went to the car and connected the wires to my battery and started manipulating the variable resistor until I heard the relay ticking. When I heard the tick I moved the variable resistor back a little bit until I heard the relay tick again (this time it’s disconnecting). Now everything is set up correctly. I tried to cover the CDS (Cadmium Sulfide Cell) with my hand to make it "think" it’s dark and the relay ticked. Yay! it meant that the circuit is really working and all I had to do right now is to connect the car headlights to the relay and we’re done.

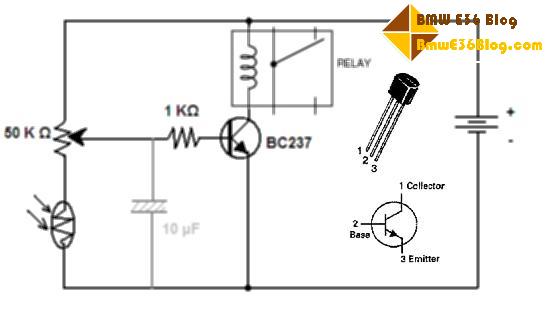
The circuit that I used is this:

When I tried to connect the headlights, I left the circuit on and after I connected the headlights to the relay, I tried again and opss. It’s not working anymore. Damn it!

It turned out that my circuit which was missing the 1KΩ resistor that is connected to the transistor base is not going to make the transistor last long. This problem is happening because the transistor base is not supposed to receive high current which I gladly sent to it. To solve this problem, I introduced the resistor to protect the transistor base and replaced the old transistor with a new one. Try again … it worked for a minute and then my radio stopped working 😆

Its seems that my battery went dead because I left the lights on for some time. beginner’s mistake huh 😀

So, I removed the circuit and tried to turn my car on but it didn’t, after that I had to abort the mission and solve the car’s problem before continuing the experiment. That’s what happened last night. I hope I will be able to give you an update on this as soon as I make this circuit perfect.

What I learned until now is that this circuit is going to work on my car, but I need more time to make it work perfectly. In case you didn’t notice, I introduced a capacitor to the circuit as well which is supposed to make the headlights work for a little bit longer when the CDS is exposed to light after dark. This is supposed to avoid light flickering inside your car.

I hope you enjoyed today’s post. Until my next adventure with this project, please stay tuned to get more updates on it.

BMW E36 Blog: The ultimate E36 information source.


Want to receive exciting tips & information about BMW E36 cars? Enter your Email:-


posted in Do It Yourself, Electrical, Technical Info, Tips & Tricks | 2 Comments

17th January 2008

Fixing BMW E36 Blower Fan Speed . . . DIY!


It has been two weeks since my blower fan stopped working correctly on the low speed options (1, 2 and 3 ). It only works on high speed (Option 4). At first, I thought that the problem was in the fan speed switch because I’ve seen this problem before and when I told my electrician about it, he disassembled the switch and tried to clean it. Of course this solution didn’t work. So, I’ve decided to dig for the solution myself and I found that this is a pretty common problem among E36 cars. The problem is that speed 1, 2 and 3 are controlled by something called (Final Stage Unit on digital climate control units, Blower Resistor Pack on analog climate control units). The 4th speed is actually uncontrolled, so, it simply bypasses the final stage or resistor pack units. That explains why the fan works on the 4th speed and not the other lower speed options. Anyway, I tried to find a DIY (Do It Yourself) procedure on how to fix this problem and I found one that was written by "Deem3" on bimmerforums (thank you Deem3 for the great write-up). Now take a look below. It’s a really simple procedure. I will be trying it this weekend to see how it goes. I will post more details about this job soon (hopefully) 🙂 .

Disclaimer: Use this info at your own risk!! I’m not responsible if this didn’t work for you :-).

Symptoms (2 cases):
– Digital Climate Control: All the lights on your digital climate control are working and the buttons respond but the blower doesn’t blow any air.
– Analog Climate Control: The blower doesn’t work except on the highest speed (4th position)

Tools:
– Phillips screw driver
– Torx 20 driver
– 10mm socket, rachet and extension

Parts:
– 64.11.6.929.540 New
– 64.11-8 380 580 Old
Note: if you have analog climate control (with the knobs), the part numbers here maybe incorrect.

If you have digital climate control we need to buy a final stage unit. Costs about $100 at the dealer if you have the discount, otherwise it’ll be about $125. Apparently there are two part numbers for this part they both look the same but I’m guessing the new one has been improved. Anyway you only need the new part the old one is the one you’re replacing. Here’s what it looks like:

If you have analog climate control (with the knobs), what you’ll need to replace is the fan blower resistor pack. Take a look:

To replace it, we need to take off the driver’s side knee bolster. This only requires you to remove two screws,one on the right side of the bolster and one on the left. Using the phillips screwdriver remove the following screws:

Now remove the speaker and footwell light.

Using the 10mm socket remove the 3 bolts holding the metal shield. And using the phillips screwdriver remove the obd2 port.

Now you should be able to see the footwell air duct. Remove it by pulling it.

With everything out of the way you should now be able to see the defective final stage unit. Remove it using the torx-20 screw driver.

Replace it with the new part and before you put everything back turn on your car and test the blower. If everything is ok proceed to put everything back, and enjoy the benefits of having a blower in your car again.


Are you looking for more do it yourself procedures (DIY) ? I recommend the Bentley BMW 3 series service manual for you. I got it and I think it’s a gold mine for us -BMW E36 Owners-. If you didn’t grab your copy yet, get it right now! I’m sure you’ll find this book worth every penny you’ve paid for. Get the Bentley BMW 3 series service manual

BMW E36 Blog: The ultimate BMW E36 information source.


Want to receive exciting tips & information about BMW E36 cars? Enter your Email:-


posted in Do It Yourself, Electrical, Technical Info | 5 Comments

25th December 2007

BMW Options List . . . Continued!


I’ve posted previously about BMW Options List and I said that you can find the list of options that your car is equipped with. In that post, I thought that a sticker should be found on the backseat with a list of numbers that are actually options codes. That was correct, but the location of the sticker was not on the back of the rear seat as I thought. It was actually placed on the back of the rear bench instead. I know that because I went and looked for it and simply didn’t find any until I removed my car’s rear bench and there it was. So, here are some simple photos for it:


Disclaimer: Use this info at your own risk!! I’m not responsible if this didn’t work for you :-).

Pull in the direction of the arrows below to remove the rear bench

After you remove that bench, you will see the sticker in the back of the bench

I took a photo of the sticker itself, I’m sorry for the dirt. I couldn’t remove it because the sticker is actually a normal paper, so using a little water or cleaner on it will simply ruin it

From the list of numbers that you can see (at the bottom of the sticker), I got my car’s list of options

031 ?
055 ?
240 Leather Steering Wheel w/ Airbag
320 Script Name Plate … what is this?
354 Anti-glare Windshield Strip
401 Sliding Sunroof Electrical
415 Sunshade for Package Shelf
423 Velour Floor Mats
428 Warning Triangle/First Aid Kit … this is missing! I’d better go find the previous owner!
440 Non-smoker’s Package
473 Front Armrest
481 Sport Seat – Driver/Passenger
494 Heated Seats Driver/Passenger
510 Headlight Adjustment Low Beam Light
554 On-board Computer V
661 Radio, BMW Business
690 Cassette Box
704 Sport Styling (body and suspension)
801 Order Control … What?
848 Enlarged Cable Harness … excuse me?

This is really awesome to be able to find all the options that came with your car. But unfortunately, I don’t recognize some of the options like 031, 055, 801 and 848. Anyone knows what are these options? Now, I would love to see you guys doing the same thing and lets see if you have any special/rare options on your cars. Try it and let me know.


Are you looking for more do it yourself procedures (DIY) ? I recommend the Bentley BMW 3 series service manual for you. I got it and I think it’s a gold mine for us -BMW E36 Owners-. If you didn’t grab your copy yet, get it right now! I’m sure you’ll find this book worth every penny you’ve paid for. Get the Bentley BMW 3 series service manual

BMW E36 Blog: The ultimate BMW E36 information source.


Want to receive exciting tips & information about BMW E36 cars? Enter your Email:-


posted in Do It Yourself, Tips & Tricks, Uncategorized | 3 Comments

24th December 2007

Fixing BMW E36 Door Panels . . . Videos!


Hello, First of all, I just want to apologize for not being able to post on schedule in the last 4 or 5 days. I’ve been very busy with my relatives and couldn’t find an hour or two to even do a quick post. So, I hope that you have missed me (or missed my posts at least 😆 ). For today’s post, I have found these 3 videos which precisely show how you can remove your BMW E36 door panels, fix them and re-install them again. After you’re done with these videos, please pay attention to the sound of the door while closing. It’s a magnificent sound. I hope you find these videos useful. In case you hate videos (well, I don’t know why you should be), but you can find another DIY that I have posted before about fixing your door panels. You can find it here Fixing BMW E36 door panel!.

Check it out!


I hope you liked the video . . . if not, come on let’s see your videos 😉

BMW E36 Blog: The ultimate BMW BMW E36 information source.

Want to receive exciting tips & information about BMW E36 cars? Enter your Email:-


posted in Do It Yourself, Interior, Technical Info, Tips & Tricks | 12 Comments