BMW E36 Blog

Professional Car Audio Upgrade Translated

9th May 2008

Professional Car Audio Upgrade Translated


Thanks to Valery for the translation of the Professional Car Audio Upgrade. He is so kind and has translated the whole DIY for us. I’m still confused a little bit about some parts of this DIY because I don’t have much knowledge about fiberglass, but I think the result is awesome! Now, you can understand the procedure easily. Thanks again Valery.

Disclaimer: Use this info at your own risk!! I’m not responsible if this didn’t work for you :-).

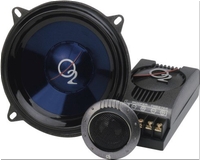
Hi everyone, I’m 19 and I own a E36 325TDS with a lot of extra parts for it so that I modify inside and out a little bit. I installed a Oxygen Alium 5, 13cm diameter Kit and a 20cm Speaker Oxy Alium 203.

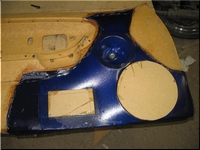
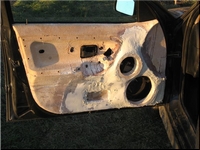
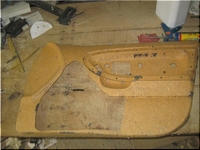
First, I removed the vinyl, and then cut the panel

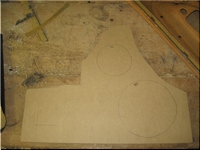
Next, I cut a piece of MDF (Medium Density Foam) of 19mm thick

A little bit of fiber to maintain the MDF. Check out the door:

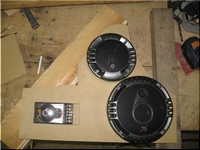
Here is what I used, you’ll tell me “It is not wow” but I couldn’t afford better, these speakers are really good for the price.

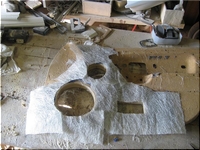
Setting the canvas, this is not some cheap fabric :p this is lycra 😉 I know I know 😉 back to work, major advantage of the lycra is its scalability.

Application of resin (What is that? Ken can you help ?):

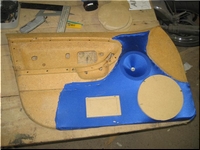
Once the resin is dry on the fabric, cut a piece of glass fiber as so:

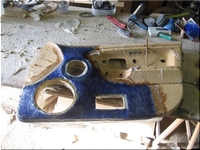
What you get once resin applied:

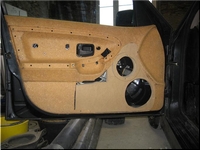
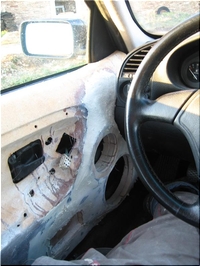
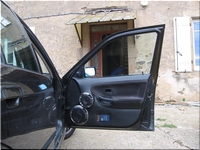
Now the most annoying part of the project 🙁 smooth all of it :s:  I hate doing it lol Here is what you get when installed:

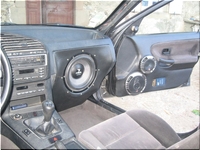
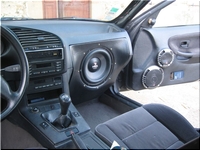
The installation progressed a bit, I replaced my previous kit by a MAC Audio Diamonds 2.13Here are the pics 🙂

So, It’s been a while since I’ve done it, I will soon replace them by a Focal Utopia 136W kit.

My latest project:
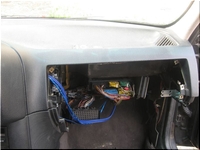
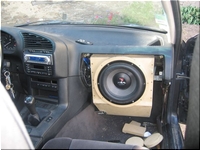
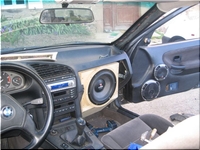
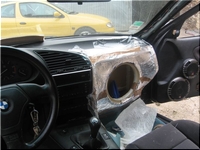
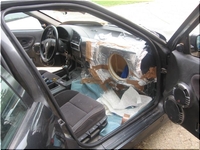
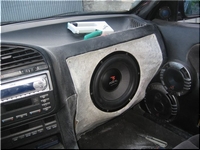
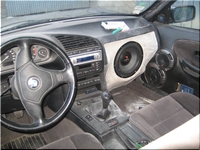
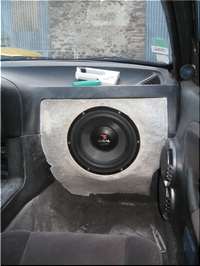
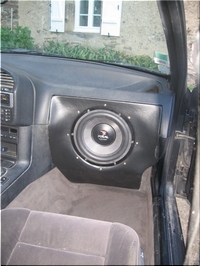
Here is the idea, as you might remember I’ve installed new speakers in my doors, I then realized that I couldn’t open my glovebox anymore lol Anyway, I decided to fit a subwoofer instead of the glovebox.The subwoofer is a Focal 27A, here we go, pictures !

First, build the box in medium 19mm, I reached a volume of 15L. I had to take out the fan system to gain space and pack everything to fit it in.

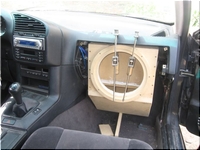
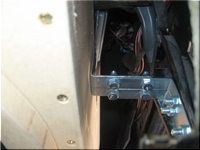
Fixing plate to hold it

What It looks like after the Subwoofer is inserted.:

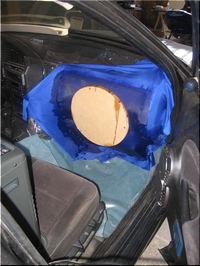
Application of the canvas to get a good shape.

I then used foil to unmould the shape I got, made of fiber.

What you get with 3 layers of fiber. Where I am right now.

Smooth the whole thing and black vinyl, with golden screws. Check out the result


Are you looking for more do it yourself procedures (DIY) ? I recommend the Bentley BMW 3 series service manual for you. I got it and I think it’s a gold mine for us -BMW E36 Owners-. If you didn’t grab your copy yet, get it right now! I’m sure you’ll find this book worth every penny you’ve paid for. Get the Bentley BMW 3 series service manual

BMW E36 Blog: The ultimate BMW E36 information source.

Want to receive exciting tips & information about BMW E36 cars? Enter your Email:-


posted in Audio, Do It Yourself, Tips & Tricks, Uncategorized | 5 Comments
8th May 2008

Professional Car Audio Upgrade


Hello,

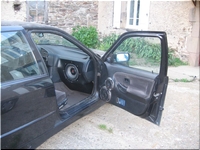
Hicham was so kind to send me a link which contains a description of how to upgrade your BMW E36 car audio in a very professional way. You can check the thread here. Unfortunately, it’s in French and because I don’t know French, I had to figure this thread out using the pictures included. I’m confident you’re going to like this very much. I included here some photos that may explain the procedure, but for those of you who understand French, you can refer to the thread I pointed out. Also, it would be great if you can translate some of the text there and post it here as a comment. That would help us understand this more. Thanks Hicham for the link.

Take a look:


BMW E36 Blog: The ultimate BMW E36 M3 information source.

Want to receive exciting tips & information about BMW E36 cars? Enter your Email:-


posted in Audio, Photos, Tips & Tricks, Uncategorized | 3 Comments

6th May 2008

18 Inch Wheels On BMW E36


Hi Guys,

I’ve seen many BMW E36 cars with 16", 17" and 18" wheel setups. I personally like the 17" wheels on BMW E36 cars most. The 16" wheels are too small and they don’t give the BMW E36 car the look it deserves, which leaves your car unappreciated. So, If I were to change my wheels, I would either go with the 17" or 18" setups. Now, if you want to go with either of these, you will have to take into account 2 factors that will help you decide:

1. Car’s engine:- If you’re riding a 318is like I do, then go with the 17". You can’t go wrong because, believe it or not, the 18" setup will put a heavy load on your engine and worsen your car’s performance.

2. Car’s suspension:- If you have a little low ride, like me (I have a stock sport suspension), then you can go with either 17" or 18". The trick is just to make sure you will not have any tire rubbing. For me, I have the 17" and they look fantastic on my car. If you have stock suspension, you can go either with 17" or 18". 18" is preferable unless you’re going to give your car a drop soon.

If you decided to go with the 18" and looking to give your car a little drop, you may either go with the 60mm drop or 40mm drop. The 60mm drop will make the car look cool, but it’s going to have tire rubbing (most likely) and it will definitely be a hard ride.

I’ve prepared some E36 pics with 18" wheel setup for you to check them out. Take a look:


BMW E36 Blog: The ultimate BMW E36 M3 information source.

Want to receive exciting tips & information about BMW E36 cars? Enter your Email:-


posted in Exterior, Photos, Tips & Tricks, Uncategorized | 12 Comments

3rd May 2008

Fuel Lines Checkup Inside BMW E36 . . . Safety Measure


Greg has posted a comment on this blog about a safety measure that everyone of us has to do. It’s about doing a checkup on your fuel lines that are coming from the fuel tank and fuel pump. This is a very important issue that I think everyone of us has to do. The problem is that this was a comment on a post and not everyone of you is going to see, so I decided to republish it again as a new post because it’s very important and needs your immediate attention. So, here you go. The post is written in Greg’s own words.

Here is a very important job every e36 owner has to do. In particular the e36 1995 318i 318is M3 323 etc owners. BMW had major problems with hose clamps on fuel lines coming from fuel tanks/fuel pumps. Ever parked your car and got out and in doing so had the smell of fuel in the air? mmmmmmmmm here’s what to do:-

1. Put both front seats all the way forward and tilt forward.
2. Now remove the back seat base by simply pulling upwards on front lower edge, remove from car.
3. You will see that there are 2 access divisions cut into the sound proofing, lift and tuck out of the way.
4. With a Phillips head screwdriver remove both oval shape covers, this gives access to the fuel level sender units and fuel pump.

If you have any fuel sitting in these 2 places I strongly suggest you carefully replace clamps with screw type ones. Be careful not to damage plastic connection pieces and if fuel has been leaking for a long time you may find the fuel line exterior may be brittle and clamp will not seal to plastic tails. My e36 coupe had all of the above and a hair line crack in the fuel level sender unit on the passenger side. Drivers side is a fuel level sender unit and a fuel pump in one. Hope you don’t have to replace the cross over fuel line ( the 12mm fuel line) as you may have to remove fuel tank to do so. It has a metal centre section you can see that is attached to body of the car. Hope this info helps out.

Please check it out it only takes 15 minutes to check it and may save your car from burning to the ground.

Kind regards to you all,
Greg ( from Adelaide Australia )


Thank you Greg for sharing this information with us.


BMW E36 Blog: The ultimate BMW E36 M3 information source.


Want to receive exciting tips & information about BMW E36 cars? Enter your Email:-


posted in Technical Info, Tips & Tricks, Uncategorized | 5 Comments
1st May 2008

BMW E36 Xenon HID Options


These are the 3 most common xenon HID lights available for the BMW E36. Check them out. Which one do you prefer more?

6000k Xenon HID

8000k Xenon HID

10000k Xenon HID


BMW E36 Blog: The Ultimate E36 Information Source.

Want to receive exciting tips & information about BMW E36 cars? Enter your Email:-


posted in Tips & Tricks, Uncategorized, Videos | 2 Comments