Cleaning E36 ICV (Idle Control Valve) . . . DIY!
posted in Do It Yourself, Engine, Technical Info |Hi Guys,
Car hesitation and RPM bouncing are the most common problems between the BMW E36 cars. It seems that many cars have the problem and the problem is very hard to fix. I recall that even my previous E30 used to have the problem, but some how, the problem was solved. Maybe with something that I did and didn’t notice it fixed the problem.
Now my E36 318is is having the same symptoms and it gets very annoying especially when I turn my A/C on.
I started looking for a solution to this problem and it seems that cleaning the ICV (Idle Control Value) is one of the most obvious reasons for the problem, so I looked for a DIY about it and found one. The DIY is for M42 engines. I will be writing another post to fix same problem for the M50 engines. Please notice that I didn’t try this DIY myself yet, but I’m going to do it very soon.
Please notice that that cleaning the ICV will not always fix the problem, but it’s a very common reason, so if it didn’t totally solve your car’s problem, then you have other issues, but since the procedure is very simple, I guess everyone should start with it. Please follow the steps below and see if this fixes your car’s RPM bouncing problem. Enjoy 😉
Disclaimer: Use this info at your own risk!! I’m not responsible if this didn’t work for you.
This DIY / write-up will require the following tools/supplies:
Flashlight would be helpful.
11mm socket
Flathead screwdriver
Throttle body (TB) cleaner
OEM hoses if in need of replacement
Throttle body gasket and intake manifold gasket (not technically necessary, but a good idea)
It took me about an hour to remove, clean, and put back the ICV. Plus I let the hoses dry (while out of the car) for about 20 minutes on top of that.
First, start by opening the hood with the engine off and hopefully not too hot, as you will make contact with the block and the intake manifold.
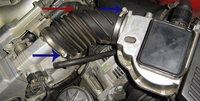
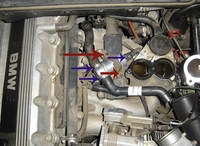
You will take off the intake tube, shown below, by loosening the screws at the blue arrows, and pulling off the hose at the red arrow. Then pull the intake tube off completely.
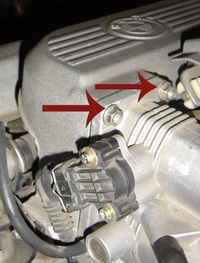
Next, you remove the throttle body, by four 11mm bolts. The top two are shown with red arrows below. The bottom two are on the bottom of the TB, in the same position as the top two.
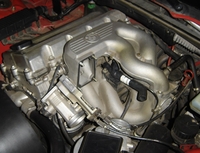
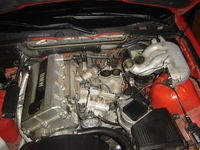
Move the throttle body off to the side, to gain access to the upper intake manifold, like this:
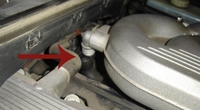
Next, we’ll disconnect the hose connecting the manifold to the ICV we wish to remove and clean. Behind the manifold, at the back of the engine bay, is the hose. Just twist it off, as shown by the red arrow.
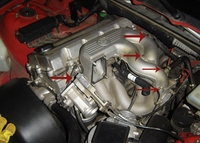
Now it’s time to remove the upper intake manifold. Undo all 5 of the 11mm nuts attaching it to the lower manifold. The nut locations are highlighted below with red arrows. The nut in the rear of the engine bay is hard to get to, but a small 11mm socket and 1/4″ drive ratchet should get it out.
Next, carefully remove the manifold, by slowly lifting it up. I pried it off woodworker style using the backside of a hammer against the block. Be sure to remove it evenly though, lifting it up equally on all sides. Otherwise it will get stuck on the bolts on the manifold’s drivers side. It is easiest to place it as shown:
Now we have acces to the ICV. As shown below, it is attached with a rubber strap at the point shown with red arrows. The blue arrows indicate the electrical connection, which pulls of when you press down a wire clip. They also point to the hose connections, which you will also want to remove. Note the arrow on top of the ICV. It points TOWARDS the block. The part label with Bosch and the BMW part number written on it also face the front of the car. This is important. You want to put it back facing the correct direction.
Now, take the ICV and clean it. The image below shows the ports into which the tubes were plugged, and air flows, with a blue arrow. You’ll want to hit it with an old toothbrush and a gratuitous soaking with the TB cleaner. You may choose to clean the throttle body itself while at it with some paper towels and the cleaner.
Let everything dry, and clean off the hoses if you’d like. One of mine was cracked and therefore replaced, but washing the oil and grease off of them will help them last longer. Replace any that are cracked! They will make your idle worse and allow unfiltered air into the engine = bad. Be sure to let everything dry, especially items that were cleaned with water (hoses.) Installation is the reverse of removal. Be sure to connect ALL the hoses – double check!
Are you looking for more do it yourself procedures (DIY) ? I recommend the Bentley BMW 3 series service manual for you. I got it and I think it’s a gold mine for us -BMW E36 Owners-. If you didn’t grab your copy yet, get it right now! I’m sure you’ll find this book worth every penny you’ve paid for. Get the Bentley BMW 3 series service manual
Wait for more from BMW E36 Blog.
Best regards,
Tony Sticks.
Related Posts:-

Want to receive exciting tips & information about BMW E36 cars? Enter your Email:-


 (24 votes, average: 3.79 out of 5)


posted on September 29th, 2008 at 12:06 pm
posted on September 29th, 2008 at 12:38 pm
posted on September 29th, 2008 at 1:50 pm
posted on October 1st, 2008 at 4:21 pm
posted on October 10th, 2008 at 11:32 pm
posted on October 10th, 2008 at 11:48 pm
posted on October 11th, 2008 at 12:39 am
posted on October 16th, 2008 at 11:53 am
posted on October 25th, 2008 at 9:09 am
posted on October 26th, 2008 at 10:07 am
posted on November 17th, 2008 at 12:52 pm
posted on November 17th, 2008 at 5:07 pm
posted on November 18th, 2008 at 12:53 pm
posted on November 21st, 2008 at 6:00 pm
posted on November 21st, 2008 at 6:04 pm
posted on November 30th, 2008 at 9:15 pm
posted on December 1st, 2008 at 11:58 am
posted on December 1st, 2008 at 12:57 pm
posted on December 9th, 2008 at 1:35 pm
posted on May 10th, 2009 at 3:47 pm
posted on May 11th, 2009 at 11:10 am
posted on May 18th, 2009 at 3:43 pm
posted on September 20th, 2010 at 3:32 pm
posted on November 2nd, 2010 at 7:21 am
posted on November 2nd, 2010 at 7:28 am
posted on November 16th, 2010 at 4:22 pm
posted on November 17th, 2010 at 4:25 am
posted on July 26th, 2011 at 12:48 am
posted on August 21st, 2011 at 7:34 am
posted on June 30th, 2012 at 3:15 pm
posted on July 1st, 2012 at 10:38 pm
posted on September 22nd, 2012 at 11:15 pm
posted on October 1st, 2012 at 3:28 pm