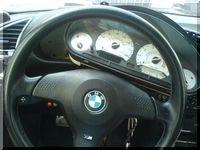
Installing Plasma Gauges For Your BMW E36 . . . DIY!
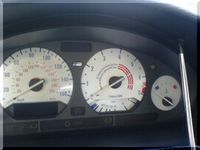
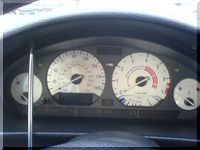
This DIY (Do It Yourself) is a contribution by Daniel Castro, thanks Daniel. In the following text, you will find a detailed procedure on how you can remove your gauges cluster and disassemble it in order to replace your OEM gauges with the Plasma type. I know that almost everyone here is looking for these gauges but unfortunately I couldn’t find them on the German eBay where I found them for the first time. I’m not sure where you can get them from now, but I will keep looking and hopefully I will find them. Daniel, do you know where I can get this from? If you want to know how they should look like after you finish, take a look at the BMW E36 With Plasma Gauges and BMW E36 with blue interior LED lights . . . Wow!
Disclaimer: Use this info at your own risk!! The author is not responsible if this didn’t work for you :-).
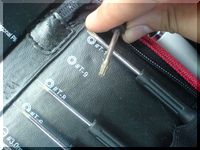
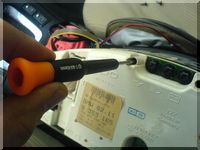
1. Removing Screws:
Remove upper Left & Right screws using a 4 cornered screw driver. Once removed, use a flat screw driver to remove the whole unit from above.
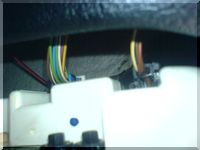
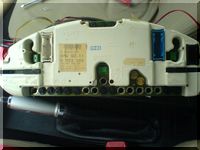
2. Removing Sockets:
Pull the unit until the wires at the back are exposed. Remove the sockets by pushing the lever upwards or to the direction shown above. 3 sockets are to be removed, Black, Blue and White.
No need to remove the Steering Wheel, adjust it to the lowest position. After all the sockets are removed, just slowly slide the unit to the right side of the steering wheel, as shown below…
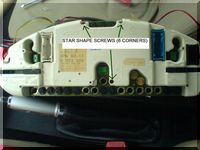
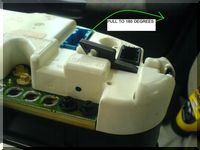
3. Unit Disassembly:
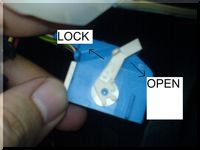
Use a #T-9 screw driver (hex shaped) to remove the screw (3 pcs) as shown below. Then Lift the level locks on the left & the right.
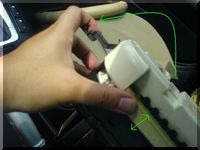
Lift both levers at the same time. Notice the outer back cover is lifted. Now, you will see 3 stick locks, Rotate the white locks wrapped around the black plastic poles.
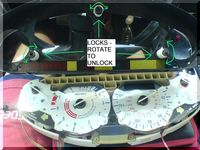
Afterwards, you may separate the front cover from the middle part.
In my case, I have not locked them back, so I can easily lift or separate the middle part along with the back part. As shown below…
Using two flat screws, or anything that can lift the needles (of the Instrument Cluster).
BEWARE : The Needle pins are very SENSITIVE, as it can easily be bent.
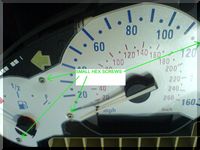
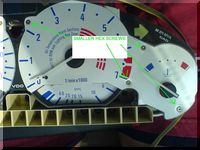
Once all five needles are removed, remove the smaller hex shaped screws and place the Illuminating gauge face.
Placing the needles back is tricky, I recommend you rotate the pin by 45 degrees, hold it down, then place the needle slowly, pointing to 0 or minimum.
Reverse the whole process to install it back to it’s original place.
Are you looking for more do it yourself procedures (DIY) ? I recommend the Bentley BMW 3 series service manual for you. I got it and I think it’s a gold mine for us -BMW E36 Owners-. If you didn’t grab your copy yet, get it right now! I’m sure you’ll find this book worth every penny you’ve paid for. Get the Bentley BMW 3 series service manual
BMW E36 Blog: The ultimate BMW E36 information source.

Want to receive exciting tips & information about BMW E36 cars? Enter your Email:-
posted in Do It Yourself, Interior, Tips & Tricks, Uncategorized | 5 Comments

 (4.86 out of 5)
 (4.07 out of 5)


