BMW E36 Blog

Fixing E36 Heated Mirrors . . . DIY!

12th December 2007

Fixing E36 Heated Mirrors . . . DIY!


If you read my previous post about BMW E36 Heated Mirrors, you should know that one of my heated mirrors is not working. Today, I’ve decided to look for a procedure on how to fix heated mirrors in BMW E36 cars. It seems the procedure is easy, but needs some attention to make sure that you will not end with a broken mirror instead of a working one. Anyway, I’m sure that many of you will find this post useful as it will save you around 300$ for replacing the mirrors. Finally, I just wanted to thank Kam for writing this priceless procedure.

Disclaimer: Use this info at your own risk!! I’m not responsible if this didn’t work for you :-).

I live in Ottawa Canada and here we have very cold winter with lots of freezing rain and snow. For a while I was under the impression that I don’t have heated mirrors because they were colder than ice. I called couple of BMW dealers in the city and they told me the same: “$300+ for both and they often burn out in couple of months any way!” I decided to keep the $300 and clean the mirrors manually . Everything was fine until last week which we got hit by heavy freezing rain and lots of snow. My car (parked outside) was turned into an ice cube! I had to use hair dryer to defrost the mirrors for 20 Min. Still I wasn’t pissed until my neighbor with his neon told me his car has heated mirrors and it’s awesome! That was it, I needed the heated mirrors…
Here are the steps…

1-Removing the mirror lens. (refer to Bentley manual and make sure car is in room temperature or above otherwise you are going to break some plastic parts)

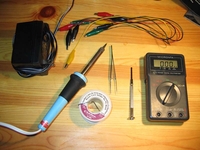
2-Tools: These are the tools I used and you may not need all of them:
– 25 Watt Solder gun (Must)
– Rosin Core Solder wire (Must)
– Tweezers (Optional)
– Small flat head screwdriver (Must)
– Multi-meter (Must)
– 9 or 12V, 15W or higher DC power supply (Optional)
-Alligator clips (Optional)

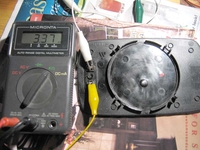
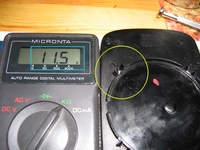
3- Use the Alligator clips and connect the multi-meter to the lens power plugs. I found out the readings are very high (3.37 KOhms) which should be something close to 10-20 Ohms.

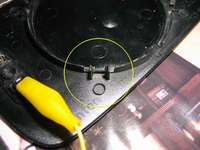
4- In order to access to the heating elements (similar to rear window defroster) I used the gaps under the housing clips.

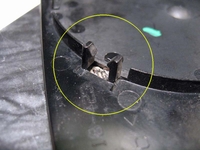
5- Use the flat screw driver and shave off the resin very carefully (I did all 4 of them) you should be able to see the copper lines.

6- Use tweezers or flat screwdriver to short the copper lines. The multi-meter should read 10-20 Ohms if so (Bingo) go to the next step otherwise (F***) move to the next spot.

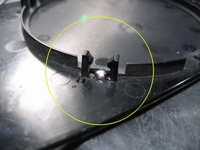
7- Make sure your Solder gun is very hot and keep it over the clips above the copper contacts. Be careful don’t melt anything. Attach the rosin core solder wire to the tip of the solder gun. The rosin solder wire instantly melts. Continue feeding the solder gun tip with rosin core solder wire. After a few seconds the melted solder will drop exactly over the copper contacts with out melting or damaging any thing. Thanks to gravity

8- Now readings on the multi-meter should be much lower like 11.5 Ohms in my case. Done, enjoy your heated mirror…

Before installing the mirror lens use the screwdriver and shake the solder and make sure it is secured completely. I used the DC power supply and tested the mirror lens and it instantly warmed up. Don’t keep it too long because it may burn your DC adaptor. I didn’t bother to cover the shaved spots with anything yet but you can find a heat resistance glue and cover the shaved spots.


Are you looking for more do it yourself procedures (DIY) ? I recommend the Bentley BMW 3 series service manual for you. I got it and I think it’s a gold mine for us -BMW E36 Owners-. If you didn’t grab your copy yet, get it right now! I’m sure you’ll find this book worth every penny you’ve paid for. Get the Bentley BMW 3 series service manual

BMW E36 Blog: The ultimate BMW E36 information source.


Want to receive exciting tips & information about BMW E36 cars? Enter your Email:-


posted in Do It Yourself, Electrical, Technical Info | 11 Comments
18th November 2007

Making your BMW Angel Eyes Fadeout . . . DIY!


I’ve published A sweet idea for your BMW angel eyes! before in which there was a video for a BMW E36 which has a fading out angel eyes. The fading effect looked very nice on that car and I promised back then that I’m going to search for a DIY that will help you guys create this effect on your cars too. Guess what? I have found that DIY and luckily, it seems very simple and straight forward.This DIY procedure was created by clumpymold from BimmerForums. I hope you like it.

One last thing, this DIY (Do It Yourself) is assuming that you have done the Footwell light for your BMW E36 . . . DIY! procedure although it not necessary. Anyway, you can check it out if you like. You may find it useful.

Disclaimer: Use this info at your own risk!! I’m not responsible if this didn’t work for you :-).

The purpose of this modification is for the angel eye rings to fade on when the interior lights go on and for the angel eye rings to fade off when the interior lights go off. Since I have an aftermarket alarm, this is considered a “remote” feature.

You do NOT have to have an alarm nor angel eyes to utilize this write-up. You could have your city lights fade on/off whenever you unlock/lock your vehicle with your key as well. The possibilities are endless.

Anyway, without further ado, here is what you need:

– Wire stripper (I prefer using scissors)
– 4 male connectors (one pink, one blue, preferably)
– 1 female connector (pink, preferably)
– 3 wire taps
– 1 diode (I used a 2.5A 1000V one – 3pk @ Radio Shack $1.69)
– 3-4 feet of electrical tape (NOT PICTURED)
– electrical tape or heat shrink & lighter (NOT PICTURED)
– crimper
– screwdriver (Philips – standard size “+”)
– voltmeter (just in case)

I realized, after completing this project, that you do NOT need the two pink pairs of male/female connectors (center left in picture). In case you do not know, pink colored connectors are for smaller gauge wires whereas blue are for larger gauge wires. I’d recommend pink throughout unless you’re combining two wires into one connector.

I arranged the connectors and wire taps in essentially the format you’re going to be replicating (minus the two PAIRS of pink connectors).

Since I had everything above, the only thing I had to purchase for this DIY was the diodes. Total cost ~$2.00.

Summary:
What you’re basically going to be doing is connecting the two wires going to each side of the parking lights (i.e., your angel eyes) with one wire and connecting that wire to the positive wire of your footwell light (or dome light for you older model BMWs). It’s pretty much as simple as that.

Here’s a picture of my Bentley Repair Manual electrical diagram in case anyone was curious as to what I’m doing:

First off, remove the three screws holding the panel above the pedals. One is to the left of the steering wheel, another to the right, and the third is underneath on the left side (see pictures below). While doing that, remove that one screw holding the light switch in place (see first picture):

After you remove all the screws, grasp the left side of the panel and pull slightly outward away from the car. You’ll see this plastic tab which holds the panel in place:

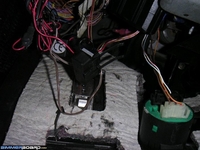
You’ll then see this mess:

Now unplug (i.e., by squeezing) the black and white connectors plugged into whatever that funky circular thing is . Pull the plug connected to the footwell light (black plug) and disconnect your OBDII connector (if you have one). Pull panel towards the driver’s seat and set panel aside.

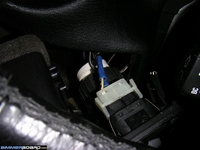
Now gently pull the headlight switch out. What you’ll see behind is one white plug for the fog lights and a round black plug for the main headlight switch (see picture below). Squeeze the white plug and disconnect. Remove the round plug by turning counter-clockwise (when facing the plug as if you were IN the dash). Set entire swith and vent aside.

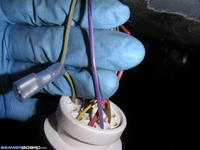
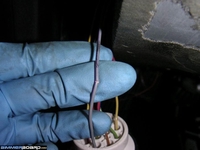
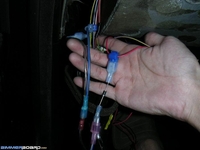
What you’re looking for are TWO wires. One is GRAY/VIOLET and the other is GRAY/YELLOW. I found it is MUCH easier to gain access to these wires by sliding the round plug down towards the footwell light and pulling it out from there. Now once you get those two wires out, use two wire taps, one on each wire and connect them using another wire and a MALE connector on each end of that wire (I used two separate wires instead combined into one blue male connector instead and my GRAY/YELLOW wire already happened to have a connector from a previous install so ignore that). Then add another wire tap at the center of that new wire.

What I normally do when using wire taps is I make a tiny slit in the wire to increase the connection and then crimp the tap to that (see below).

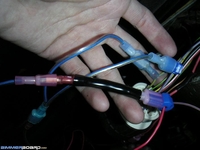
Using a longer piece of wire (~2-3′), crimp a male connector on one side and a female connector on the other side. Plug the male side into the open/free wire tap above (at the center of the wire connecting the two wires). For the female side, you’re going to use a DIODE to prevent the interior lights from coming on when using your parking lights. I used a FEMALE connector on the CATHODE side (grey stripe) and a MALE connector on ANODE side. BEFORE crimping the connectors, slide a piece of heat shrink over it (these suckers get HOT!) or you can use electrical tape afterwards. Connect as follows (the diode in the picture below has blue connectors because I already heat shrunk the diode I was going to use – so use PINK connectors as the diode’s wires are pretty thin):

Finally, add another wire tap to your POSITIVE (i.e., RED) wire connected to your footwell light (I used the long one that is attached to my lighted door sills since they were easier to access). Connect your diode (male connector) to this wire tap. Now plug the headlight switch back in and close your door. Test and make sure this modification works. Turn on your parking lights and make sure your interior lights do NOT go on. Arm/lock and disarm/unlock. If all works well, tuck the wires away carefully and replace the panel. Install is reverse of removal.

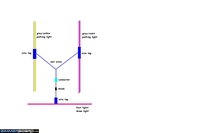
Here is a wiring schematic for this procedure:

This is a video clip for the final result video


Are you looking for more do it yourself procedures (DIY) ? I recommend the Bentley BMW 3 series service manual for you. I got it and I think it’s a gold mine for us -BMW E36 Owners-. If you didn’t grab your copy yet, get it right now! I’m sure you’ll find this book worth every penny you’ve paid for. Get the Bentley BMW 3 series service manual

BMW E36 Blog: The ultimate BMW E36 information source.


Want to receive exciting tips & information about BMW E36 cars? Enter your Email:-


posted in Do It Yourself, Electrical, Technical Info, Tips & Tricks | Comments Off on Making your BMW Angel Eyes Fadeout . . . DIY!

30th October 2007

Turn BMW E36 Airbag light off


Yesterday, I’ve taken my car to run a full-diagnosis for it. The diagnosis came back to me with two problems. First, the knock sensor which apparently needs to be replaced, but it seems like a hard job and I need to do some research before jumping into it. The second problem was with my airbag sensor. Actually, the right sensor was not running correctly and that what was causing the airbag light to keep flashing in my dashboard. So, if your airbag light keeps flashing for like 5 minutes after starting the car and then goes away, it’s more likely to have one of the sensors damaged and needs to be replaced. Of course, this doesn’t mean that this is the only reason that can cause the airbag light to keep flashing, but I guess this is one of the most common causes. Just run a diagnosis for your car and replace it if it was reported. After all, your safety is the most important thing, right?

BMW E36 Blog: The ultimate BMW E36 information source.


Want to receive exciting tips & information about BMW E36 cars? Enter your Email:-


posted in Electrical, Interior, Technical Info | 3 Comments

21st October 2007

Replacing BMW E36 Spark Plugs . . . DIY!


I have found this DIY (Do It Yourself) procedure that will help you to replace your BMW E36 spark plug. I know that you may think this task is very easy. But I think this article has some great information about spark plugs and about the oil that may be leaking inside your engine. So, read it carefully, I’m sure you’ll find it interesting.

Concerning the type of spark plugs that you should use for your E36, I prefer going with the Bosch spark plugs for my BMW, but again it’s up to you to decide which type to use. NGK is another good alternative, but I still prefer Bosch over it.


Disclaimer: Use this info at your own risk!! I’m not responsible if this didn’t work for you :-).

You can read the full article here


Are you looking for more do it yourself procedures (DIY) ? I recommend the Bentley BMW 3 series service manual for you. I got it and I think it’s a gold mine for us -BMW E36 Owners-. If you didn’t grab your copy yet, get it right now! I’m sure you’ll find this book worth every penny you’ve paid for. Get the Bentley BMW 3 series service manual

BMW E36 Blog: The ultimate BMW E36 information source.


Want to receive exciting tips & information about BMW E36 cars? Enter your Email:-


posted in Electrical, Technical Info | 5 Comments

23rd September 2007

Footwell light for your BMW E36 . . . DIY!


First of all, I want to start this post by welcoming our new friend Sean C who filled his information recently in the Welcome BMW E36 blog readers! post. For those of you who didn’t read that post yet, please do and let us hear from you. Simply, just fill your information in the comments box at the bottom of that post and you’re done. Very easy isn’t it?

I think everyone of you guys will love today’s post as it will show you how easy it’s to install foot well lights inside your BMW. I know that many of you will try to do it because it looks great on your car. If you’re anxious to see the end result of this procedure, simply skip to the end of this post to see a photo of the car at night while the foot well lights are on. I hope you like this DIY and thanks for Jarozila who created the original write-up.

For those of you who like to fix their BMW car(s) by themselves, I recommend you to get the Bentley BMW 3 series service manual which is one of the best books I’ve ever read. I got it and recommend you to get one for yourself as it will save you too much time and money while fixing your car.


Disclaimer: Use this info at your own risk!! I’m not responsible if this didn’t work for you :-).

The BMW parts I used were:

63 31 8 360 588 Lamp (2x)
61 13 8 377 072 Socket Housing (3-pin connector) (2x)
61 13 0 005 197 Bushing Contact (4x)

If you take out your dome light and take a look at the wires you will see a Brown/Red wire (power) and a Brown wire (ground). These are the wires to use if you want the new foot well lights to work with the dome light switch settings.

Using these wires the foot well lights can be set to come on with the dome light when you open the door and they fade out, or you can turn them on with the dome light.

I did not want to run wires from the dome light down the side pillar, so I thought I have to be able to find the wires when I remove the glove box. I found a Brown/Red and a Brown wire and I exposed the core to see if these would work – THEY DID.

It was then just a matter of connecting a few wires into these two cables, making holes in the panel under the glove box and steering wheel, and connecting the lights.

I really like how it looks and it will make it so much easier to find things if they drop on the floor. Was also easier to vacuum with the lights on.

This is where I found the red/brown and brown wires that looked like they went up the back and into the side pillar going up to the dome light.

This is a picture from underneath to show the new wires I connected. I also put in two wires to run over to the driver’s side. The two black wires go the the foot well light, the red & brown wires go over to the driver’s side.

This is the light inserted in the hole I cut on the passenger side.

Foot well lights off during the day with my car in an open car port.

Foot well lights on also during the day in the car port.

Here’s a picture of how it looks at night


Are you looking for more do it yourself procedures (DIY) ? I recommend the Bentley BMW 3 series service manual for you. I got it and I think it’s a gold mine for us -BMW E36 Owners-. If you didn’t grab your copy yet, get it right now! I’m sure you’ll find this book worth every penny you’ve paid for. Get the Bentley BMW 3 series service manual

BMW E36 Blog: The ultimate BMW E36 information source.

Want to receive exciting tips & information about BMW E36 cars? Enter your Email:-


posted in Do It Yourself, Electrical, Interior, Technical Info, Tips & Tricks | 12 Comments